I have been getting many questions on how to start an Azure Bicep journey – in a special and AWESOME way 😀 – which brought an idea to create the AWESOME Azure Bicep GitHub repo for the community 🎉
Long story short, this has been on ideation for few days and is life now, as of Jan 18, 2022 ! 😍
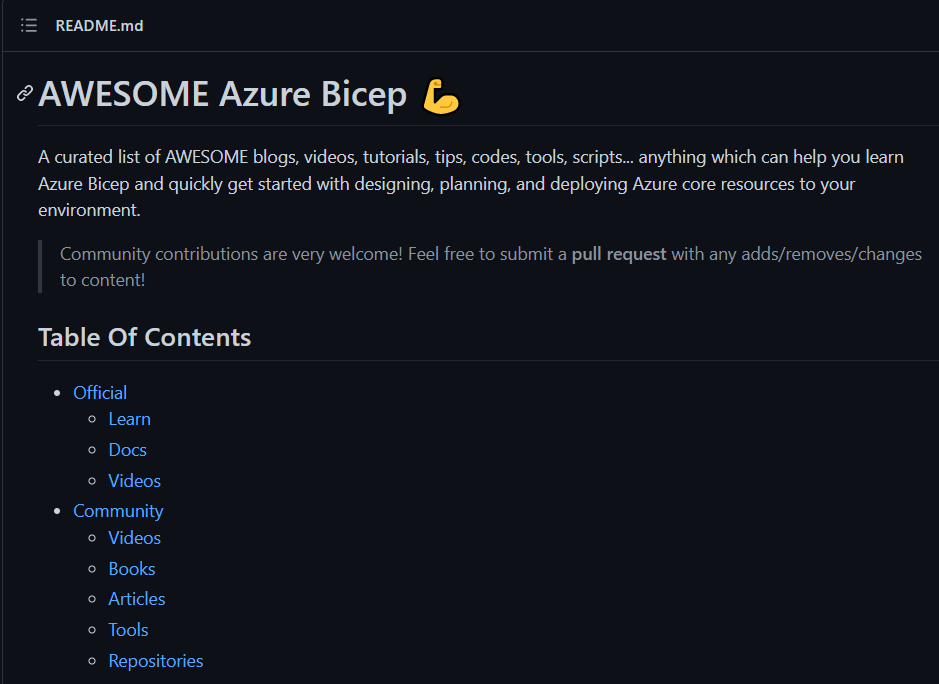
Now, I have started gradually adding important official and community resources to help new #Azure learners and #cloudmarathoners!
AWESOME Azure Bicep repo
Please, share ⭐ and fork 🍴 this repo and make your contributions.
I really ask you 🙌🙏 to make your contributions and help maintain and grow this repo going forward.
Are you looking for a simpler, more efficient way to author infrastructure resources in Azure?
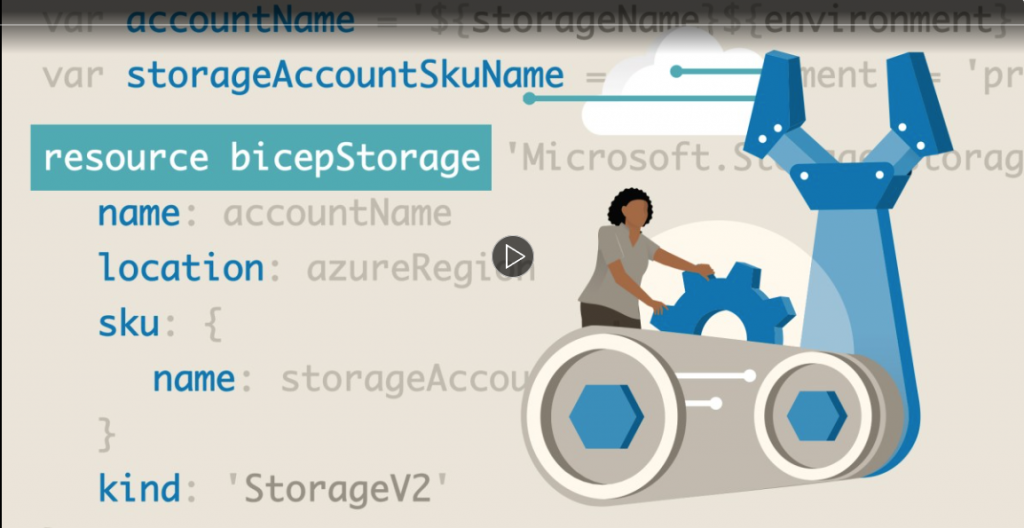
Azure Bicep First Look course
If so, you’re in luck. Azure Bicep is here to help. Bicep is a new domain-specific language (DSL) for deploying resources in Azure. It’s also a much cleaner, more concise language than ARM JSON—cloud admins and DevOps professionals, rejoice!
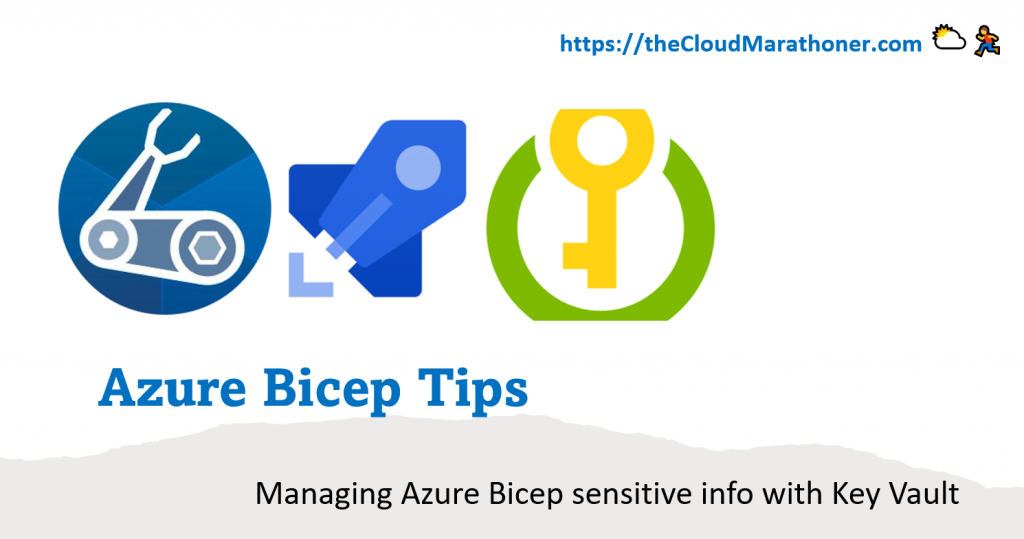
Every seasoned IT professional knows that sensitive information should not be exposed as a clear text on any code. This is especially true for infrastructure-as-code (aka, IaC) scenarios where passwords and keys are part of the deployment.
One way to stay compliant in accomplishing this goal is the integration of an Azure Key Vault service into your deployment code. This Azure security service is primarily intended to store sensitive information like password, keys, certificates, connections, etc.
In this post, we will look into two different ways how we could integrate Azure Key Vault services in our Azure Bicep code.
Option – 1: Using getSecret() function
Our first option is to delegate this important work to a getSecret() function. This option could be used with an existing Azure Key Vault resource that is declared in your Azure Bicep code.
Let’s look into an example where an existing Azure Key Vault service is referenced to provide administrative password for SQL server deployment.
Deploying Azure SQL instance with Azure Key Vault
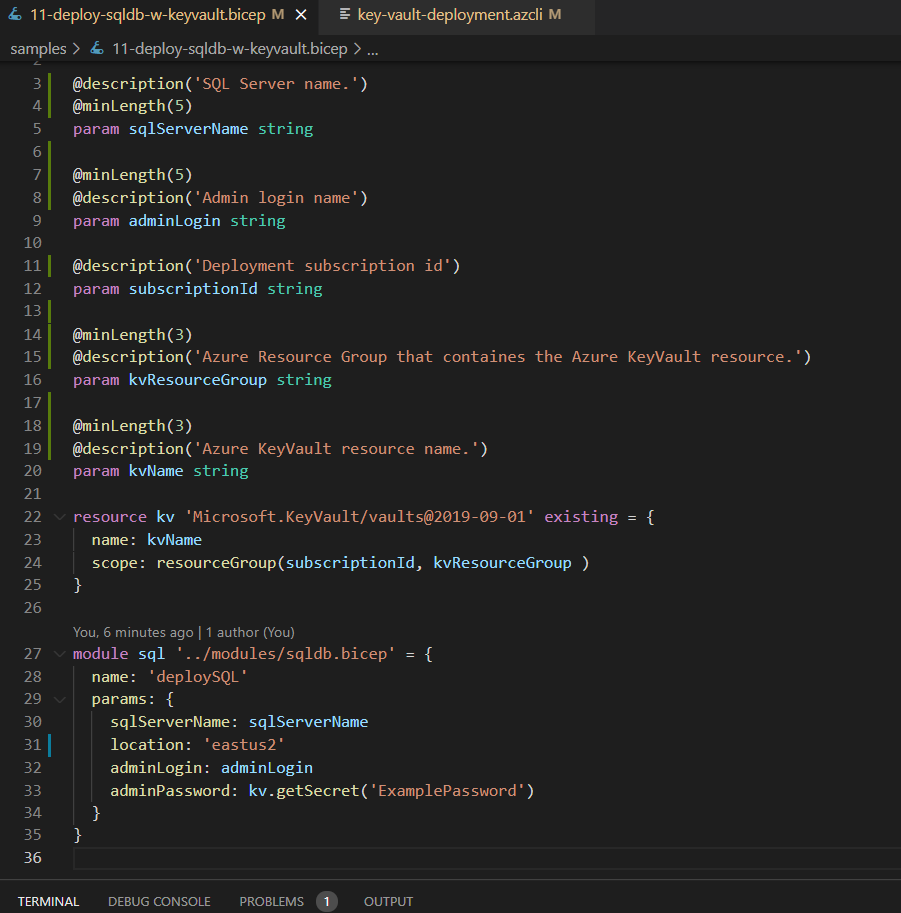
This sample Bicep code is using sqldb.bicep file as a module, where parameters; such as sqlServerName and adminLogin are passed through with a secret name of ExamplePassword.
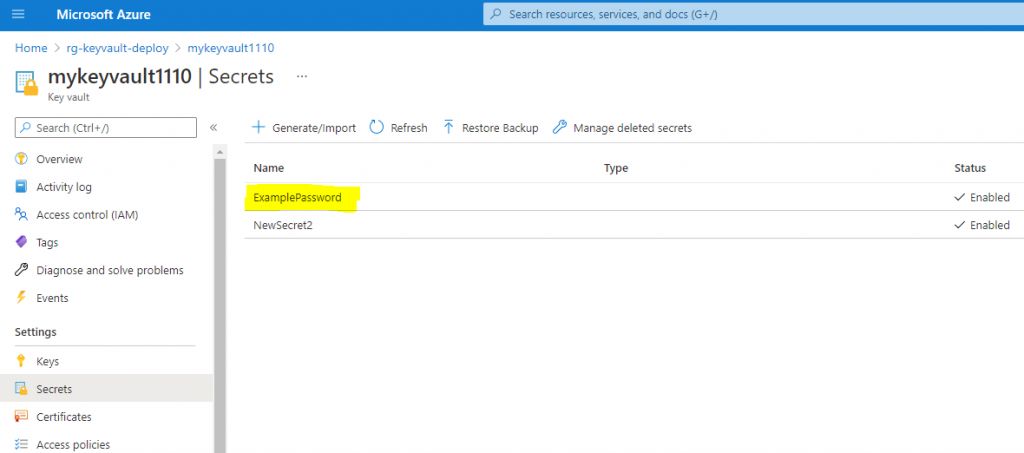
The ExamplePassword secret name should be already set and ready in the referenced Key Vault service above. Here is the view of this secret on Azure portal.
Azure Key Vault with secretes in portal
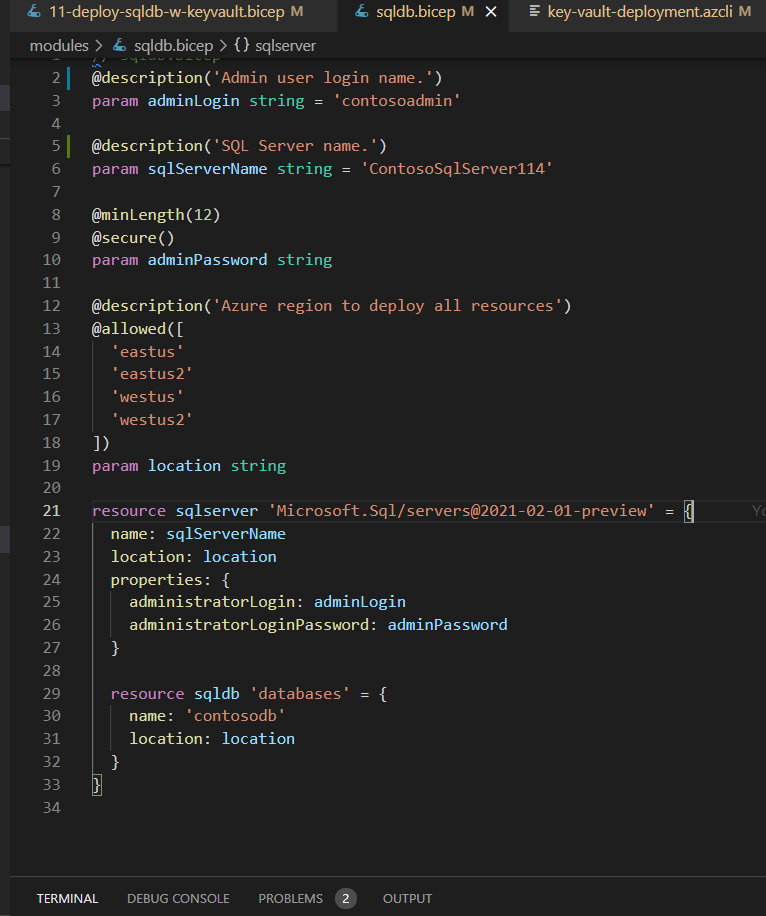
Let’s have a quick view into the sqldb.bicep file, as it is referenced in the main Bicep file.
sqldb.bicep file
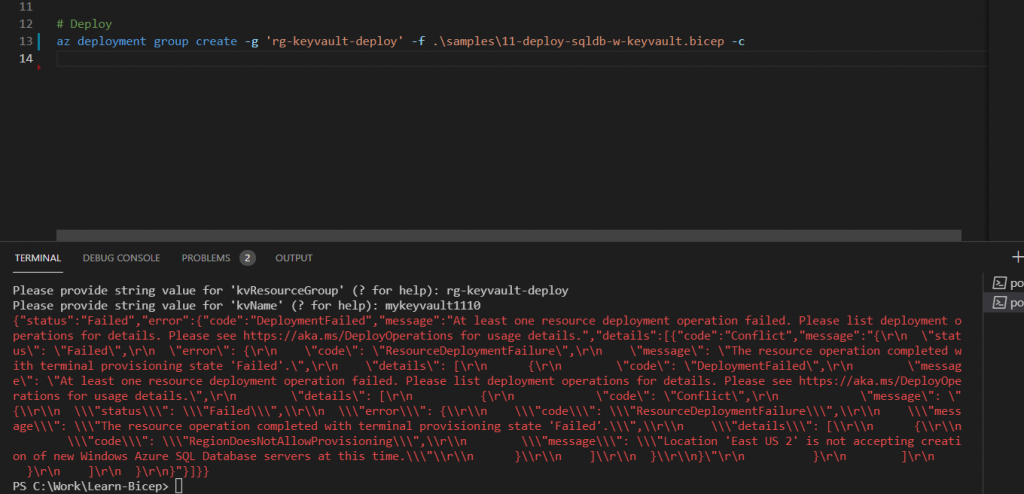
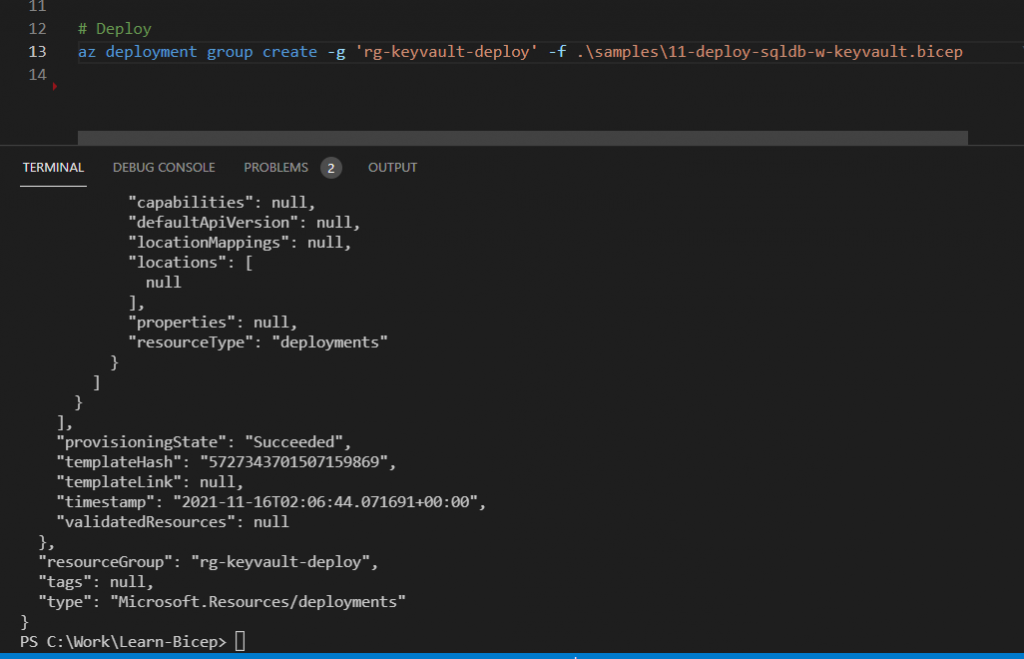
Now, let’s deploy these resources with a secret value from Key Vault resource that has a secret name ExamplePassword.
What happened? I am getting an error on my first deployment execution 🙁
Error on deploying Bicep code with SQL server provisioning
Upon carefully analyzing error, I see the following reason for this error:
At least one resource deployment operation failed. Please list deployment operations for details. Please see https://aka.ms/DeployOperations for usage details.”,”details”:[{“code”:”RegionDoesNotAllowProvisioning”,”message”:”Location ‘East US 2’ is not accepting creation of new Windows Azure SQL Database servers at this time.
Azure deployment error
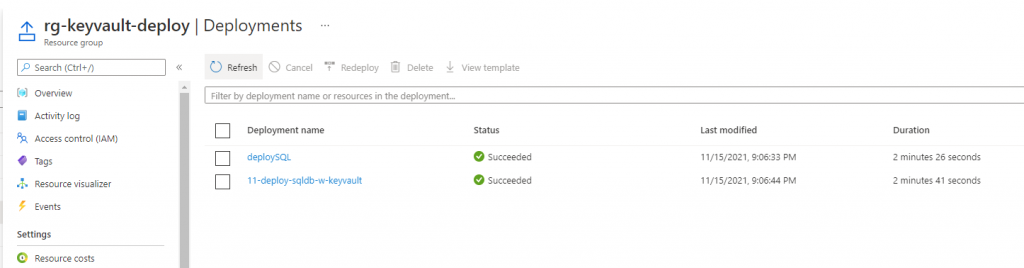
Based on the error message, we change the location to eastus and re-run the script. Now, we got the following positive result in console and portal:
Deployment results in Azure Portal RG
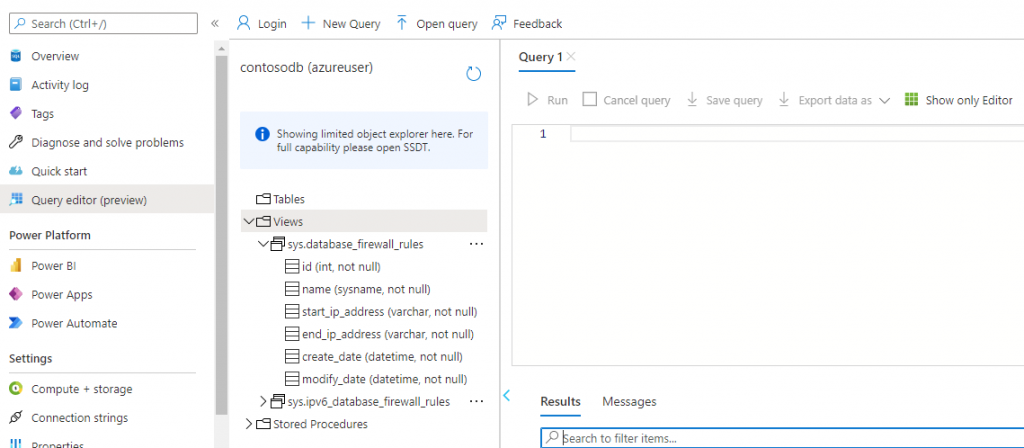
Next, we will attempt to login into a SQL Server instance. A successful login will look like the following screen:
Successful login into the SQL instance
Important Note:
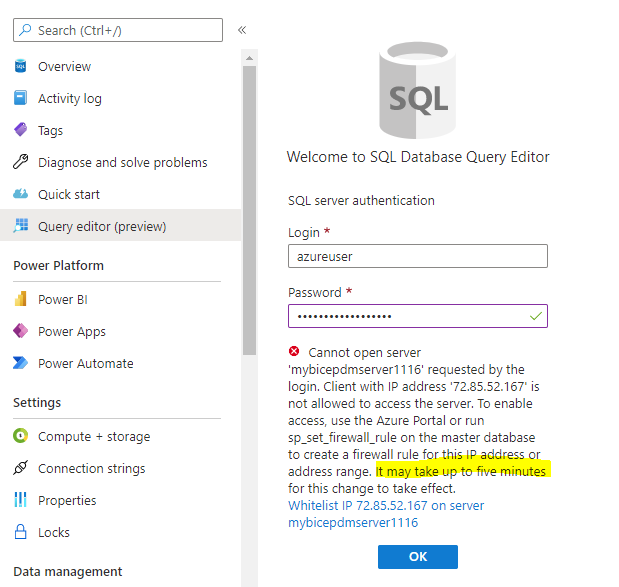
If you are getting an error during the login then try to check the following steps:
adminLogin name is entered correctly
your IP address is added to the SQL server firewall rules
grab a cup of coffee and check back in 5 minutes
Description of a typical login error into a SQL server instance is provided below. I checked the firewall rules and made a cup of coffee => before getting a successful log-in 🙂
Requires your location IP activation
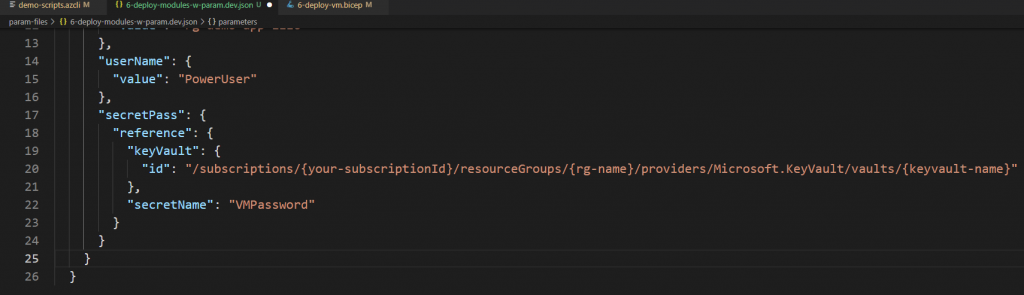
Option -2: Referencing as a secretName in parameter
The second option is pretty straightforward, if you have already used it on ARM template deployments.
We just need to reference Azure Key Vault secret like in the following example:
Using a parameter file and referencing the Key Vault secretName will do the trick in extracting the value and provisioning your resource.
Let’s run the bicep file that deploys multiple RGs and an Azure VM that uses VMPassword secret.
Running deployment with Bicep parameter file
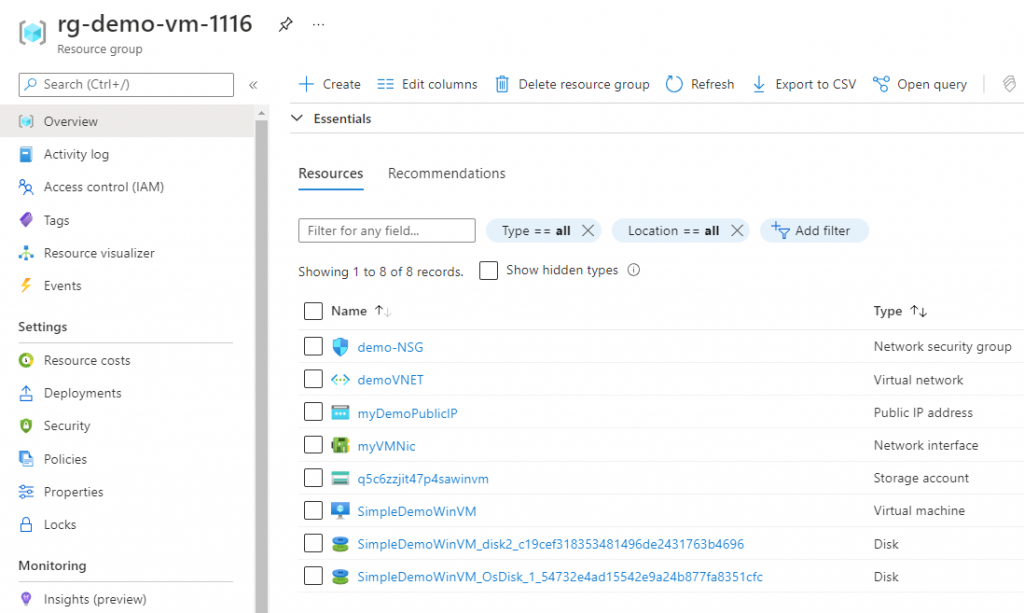
A successful deployment provisions following RG with the VM resources:
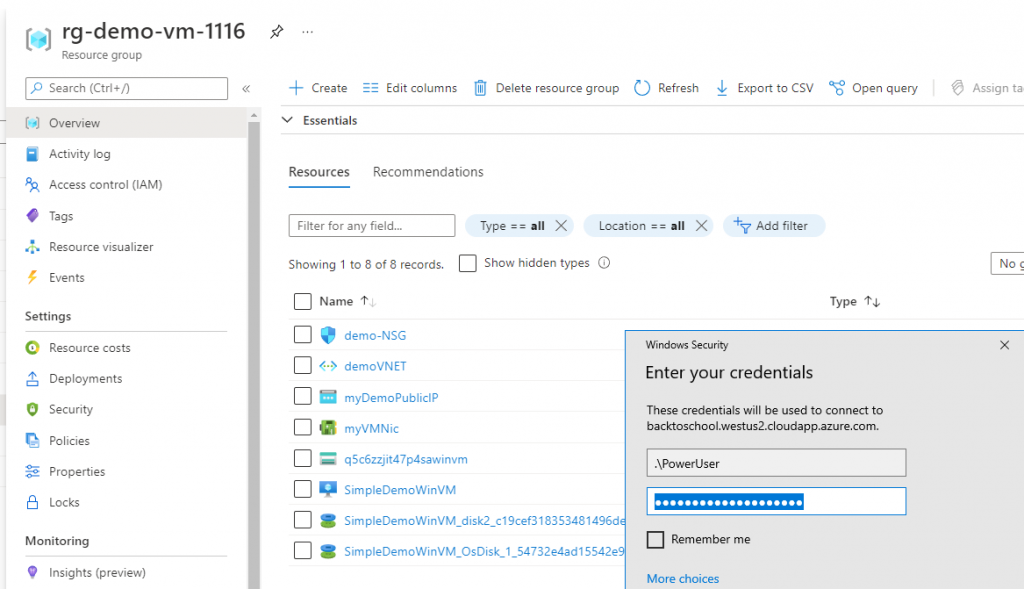
Next, we should smoke test our deployment by locating the resource group “rg-demo-vm-1116” and using deployment parameters to RDP into Windows server:
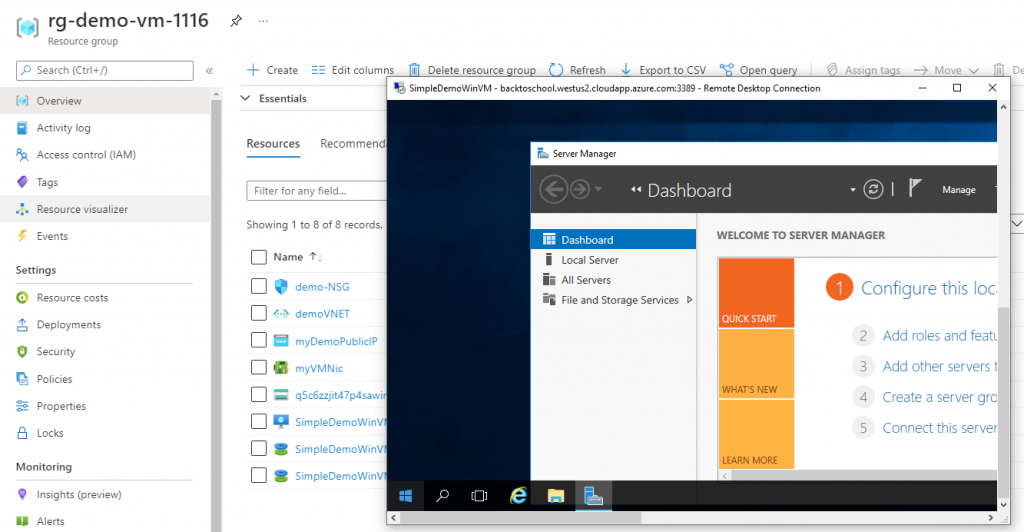
Finally, we are able to see that secret and admin user name pair worked as expected
Azure VM deployed using Key Vault secret
Summary
In this post, we looked into two available options that harden our infrastructure code by removing hard-coded sensitive information and replacing it with Azure Key Vault reference. Thus, avoiding any potential leaks of passwords, secrets, etc.
IMHO, first option is better than the later one, because it does not expose subscription id and other small details.
I am very excited to see you all in the next Omaha Azure User Group meetup. This time we will speak about the latest advancements and use cases you could apply in your Azure resource authoring toolkit.
As you may know, it is that time of a year when great content will be coming to the town! You could enjoy and learn throughout the month of December, as people behind the #festivetechcalendar will be bringing you lots of new content from different communities and people around the globe.
This year, I have submitted two sessions and have been nicely surprised yesterday. Both sessions have been accepted and I am looking forward to deliver following sessions for the community:
Session # 1: What you need to know about Azure AD security defaults?
Accepted session – “What you need to know about Azure AD security defaults?“
In this session above, we will discuss about how to get started with Azure security on right foot and its challenges. We will focus on importance of a strong Identity and Access in any cloud solution that we are creating for our customers. One simple way to get started is review and adjustment of security default options in Azure AD. We will also look into the set of practices to get you started with Azure AD setup and learn about the benefits of Azure Security Benchmark.
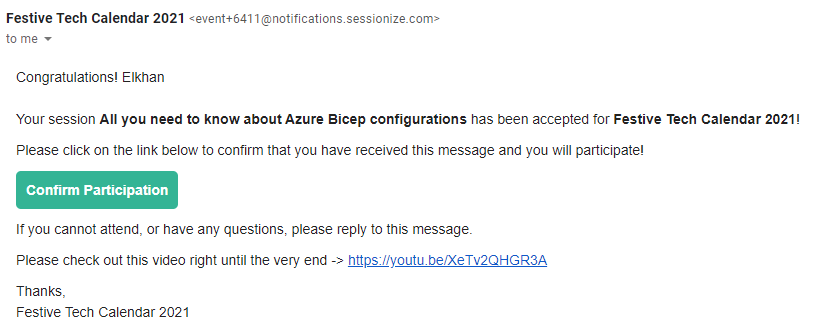
Session # 2: All you need to know about Azure Bicep configurations
Accepted session -“All you need to know about Azure Bicep configurations”
In the second session, we will talk about Azure Bicep – a new language that aims to ease Azure resource authoring and management. This new language comes with a powerful VS Code extension and config file options. In this session, we will unveil dozens of powerful features in our config file to suit your style of coding on VS Code and cheer up our productivity skills. We will apply our fresh skills by creating several Bicep demos in the process.
Conclusion
I sincerely hope that these sessions will spark your interest and I am looking forward to see you all during this event. But most importantly, I hope you could have lots of fun during this festive month.
Stay tuned for more Azure AD, Automation & Security related posts.
In my previous Azure Bicep post, I wrote about four parameterization options that could be used with Bicep language. We also looked into the Azure Bicep resource templates, and how they help to author and manage Azure resources more cleanly and easily.
Azure Bicep Tips – Hardening parameter inputs
Now, I would like to share a couple tips on how to harden your parameter inputs. This will help you to avoid deployment errors that you could easily prevent by restricting and checking Bicep parameter values.
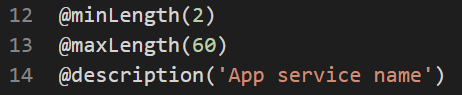
Tip # 1: Min and Max length of resource names
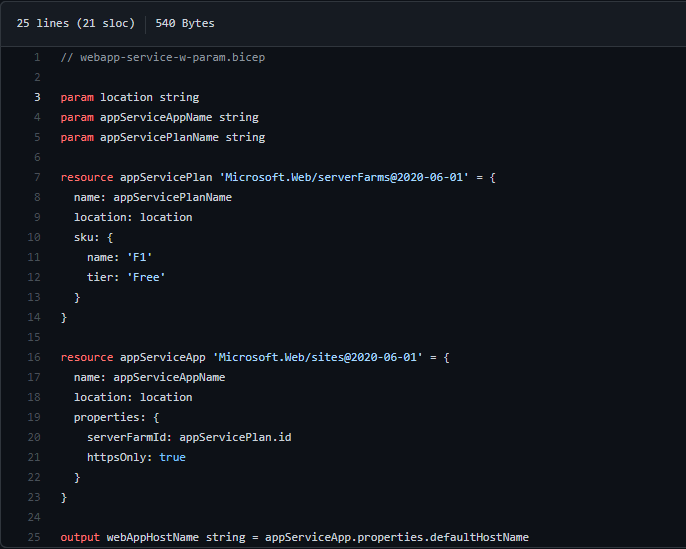
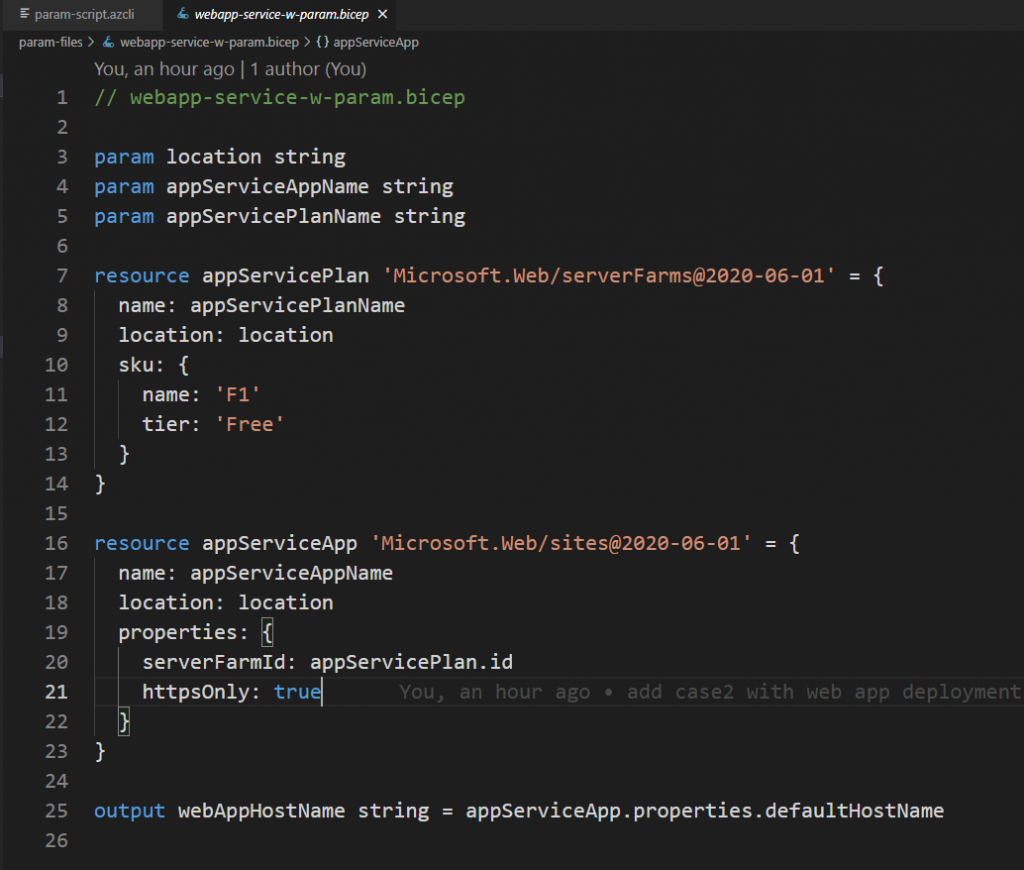
In our previous post, we have built and demoed the webapp-service-w-param.bicep file. It had no parameter input validation. Thus, that template is open for failures when you enter 'a' for the appServiceAppName input parameter. Here is the link to the repo.
webapp-service-w-param.bicep
However, it is pretty straightforward to avoid such false entries by checking the allowed name length of the Microsoft.Web/serverFarms resource in the Microsoft docs Resource name rules page.
Based on “Resource name rules” page we can add following functions:
The @minLength and @maxLength function are going to define and enforce min and max length of the parameter, while @description will help to define the purpose of the parameter.
Tip # 2: Defining purpose of the parameter
It is always helpful to add meaningful description to your parameters, even though it is not required by Azure Bicep template. Believe it or not, people who are new to your code will appreciate it. For example: we have a location parameter in our template, and adding the following description clarifies the purpose of this parameter for everyone, including myself, later in a month when I am re-visiting my code.
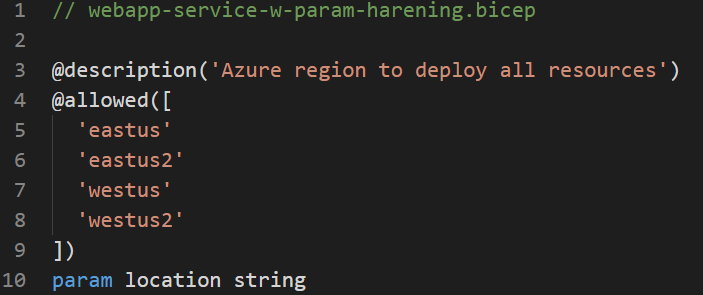
Tip # 3: Restricting parameter value entries that match your organization’s policy
The final tip is already revealed in our screen-shot above. It makes a valid and important sense to enforce your organization’s Azure policies on any provisioning scripts, in addition to the Azure Policies.
In our example: we are restricting deployment of Azure resources only into the following Azure regions to comply with the company policy to make every party happy.
Thus, I have shared a few tips that you could use to harden your Azure Bicep code and avoid some common deployment errors in advance.
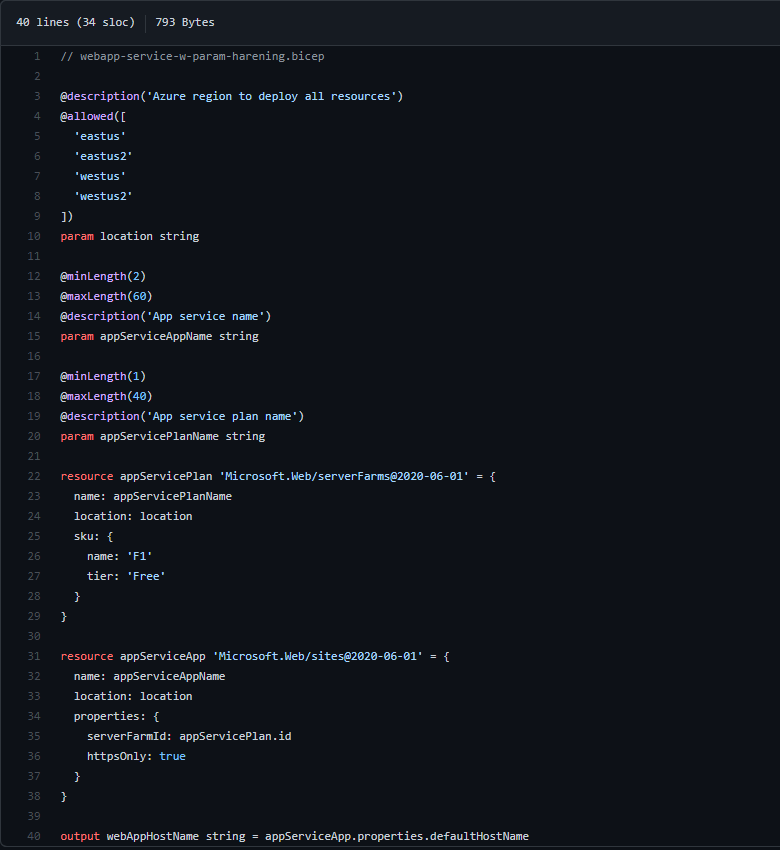
Here is the complete view into our hardened webapp-service Bicep file:
Summary
Preventing deployment failures, especially the once that are caused by invalid input parameters are an easy fix on an Azure Bicep language. Checking the resource name restrictions and allowed values is one easy tip to prevent those errors. I would recommend checking the Microsoft documentation on “Naming rules and restrictions for Azure resources” and bookmark it for your reference.
Thank you 🙏 for reading this post and learning how to prevent Azure Bicep deployment failures by hardening the input parameter values.
Please check out the Learn Bicep GitHub repo, and follow it. Thanks, 🙏 🙌!
Stay tuned for more Azure automation & Azure Bicep posts.
In my last posts, I wrote about Azure CL and a Bicep language. The Azure Bicep language, helps to author and manage Azure resources more cleanly and easily on your Azure subscription.
The parameterization of infrastructure deployment files is an important skill where true power of automation and code reuse comes forward. Let’s learn about different parameterization options that you could use in your Azure Bicep deployments. As an example, we will examine the following parameterization options on an Azure Bicep web app deployment file.
✔️ Using Bicep file as is
✔️ Using default parameters on your bicep file
✔️ Simply adding parameters into your command line
✔️ Using a separate file for parameters, per environment
Option 1: Using Bicep file as is
This first option is the most straightforward way to declare your parameters. However, you would have to enter each parameter name, every time you are deploying the Azure resources.
Following screenshot is a default Bicep web app declaration with parameters. Check the Learn Bicep repo here 👍
Now, let’s declare an Azure CLI command that will deploy our Azure Bicep file into a Resource group.
# Create a rg-test-deploy RG
az group create -l eastus -g 'rg-test-deploy'

# Option-1: Run deployment file as is
az deployment group create -g 'rg-test-deploy' -f .\param-files\webapp-service-w-param.bicep

# List all webapps in the subscription
az webapp list --query [].name -o table
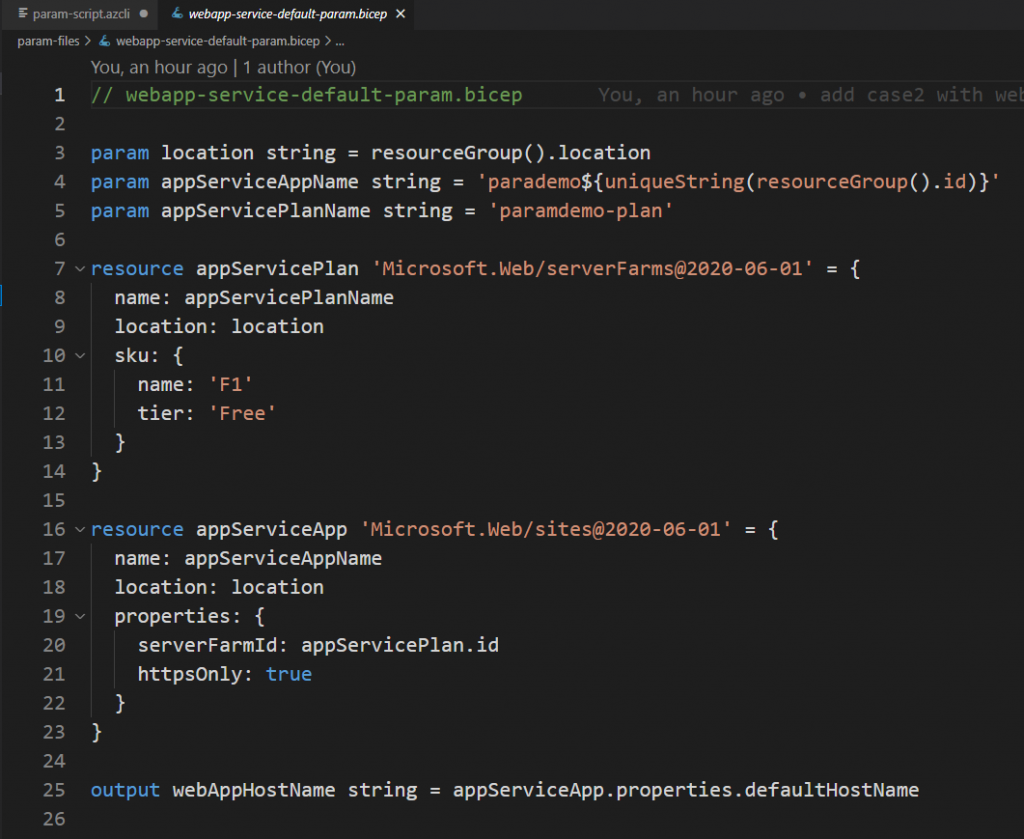
Option 2: Using default parameters on your bicep files
The second option will allow us to deploy our Bicep file without entering the default values each time. However, it would require an update on file each time you want to change parameter values 😢
Now, we can take the previous webapp-service Bicep file, and add its default values. The updated Bicep file will look like the following screenshot:
Our Azure CLI deployment script would just get a new file name
# Option-2: Run deployment with default values
az deployment group create -g 'rg-test-deploy' -f .\param-files\webapp-service-default-param.bicep

# You could also add preflight check with "-c" at the end of each deployment script
Option 3: Simply adding parameters into your command line script
If you would prefer to type parameters and values on a terminal then third option can deliver it for you. That script will look like the following sample:
# Option-3: Run deployment with inline parameters
az deployment group create -g 'rg-test-deploy' -f .\param-files\webapp-service-w-param.bicep -p location='eastus' appServiceAppName='param-demoapp18' appServicePlanName='asp-param-demo'
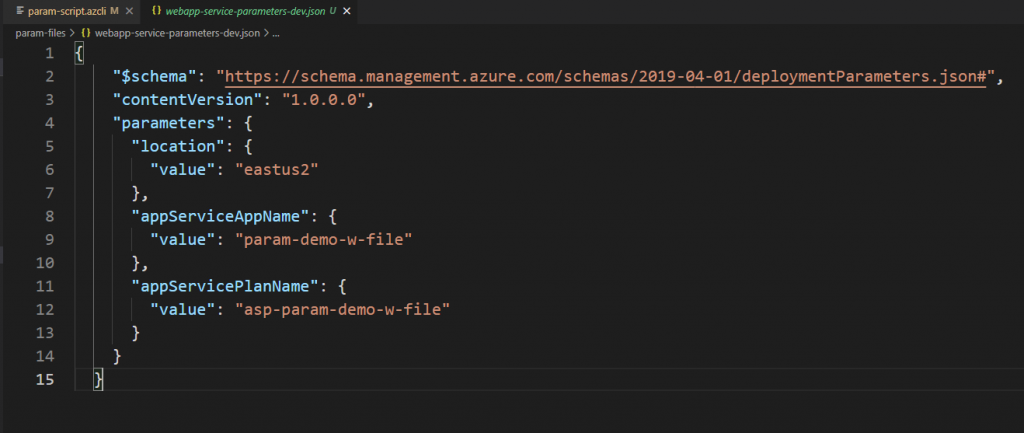
Option 4: Using a separate file for parameters, per environment
The last option has multiple advantages over prior options. As you could create separate environment parameters in their own dedicated files and manage them accordingly. For example: You can create a separate param file for “Dev” environment deployments; like in the following screenshot.
Note: parameter files for Bicep language are using a JSON notation, similar to the way how ARM JSON declares parameter files with a following schema.
And our deployment script will look like the following sample:
# Option-4: Run deployment with a separate parameter file
az deployment group create -g 'rg-test-deploy' -f .\param-files\webapp-service-w-param.bicep -p .\param-files\webapp-service-parameters-dev.json

# List all webapps in the subscription
az webapp list --query [].name -o table

# Clean all resources from RG
az group delete -n 'rg-test-deploy' --yes
Summary
Thank you 🙏 for reading this post and learning about four different options to deploy your Azure Bicep files using Azure CLI.
Please check out the Learn Bicep GitHub repo, and follow it. Thanks 🙏 🙌 !
Stay tuned for more Azure automation & Azure Bicep posts.
This month we have awesome updates from Azure bicep team that I am happy to share with all of you (Azure community, Deployment Automation, Resource management and Governance geeks 🙂
The following list are August month updates:
Bicep Linter, Snippets, Scaffolding
Right click build
Deployment Stack updates
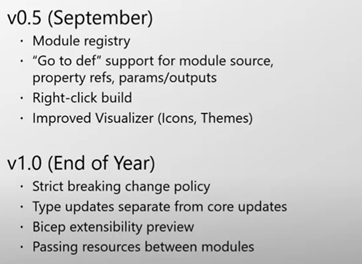
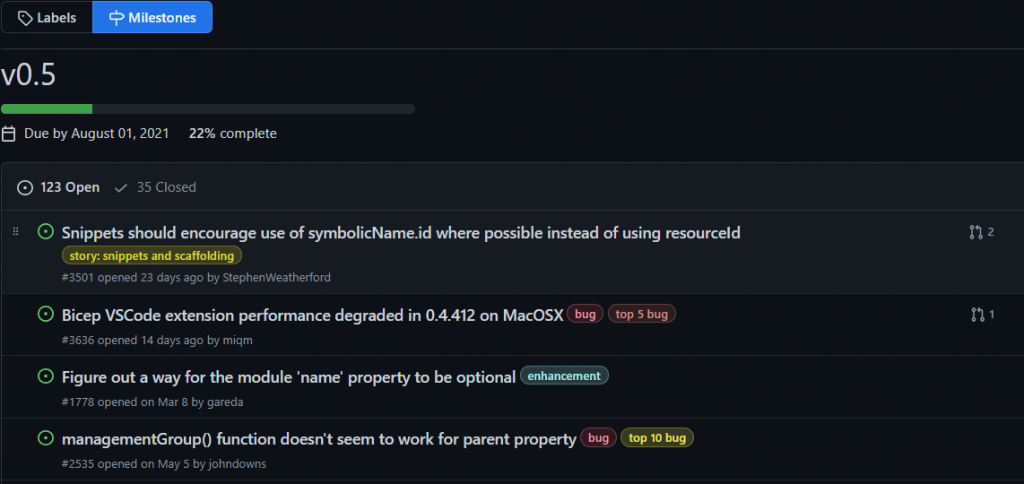
Bicep roadmap plans (v0.5 and eventually v1.0)
Bicep registry
OCI Artifact standardizations
Module registry functionality
Module Reference Syntax
Parameter Improvement options
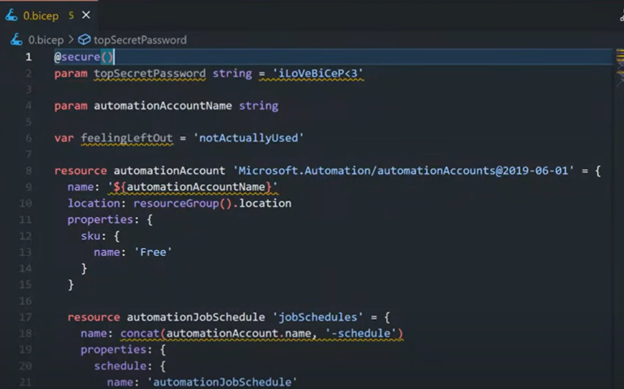
Bicep Linter updates
The yellow squiggly lines indicate the Linter violations and complains where best practices are violated. Like, password param should not be checked into the code repository. Another one is using string concat function instead of string interpolation.
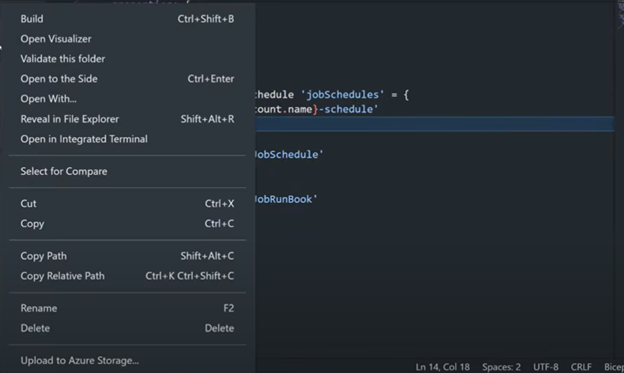
Right click build
The right click build on bicep file is a new convince feature that was also added on new build.
You can also use a shortcut keys Ctrl+Shift+B as an alternative way to build your JSON files from bicep files.
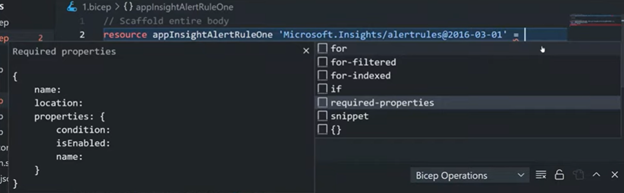
Scaffolding feature
This feature also arrived on a v0.4.6 build that provides required-properties to be auto populated to speed up your Azure resource coding. It is derived from a resources swagger spec and auto-populated for you. Yay!
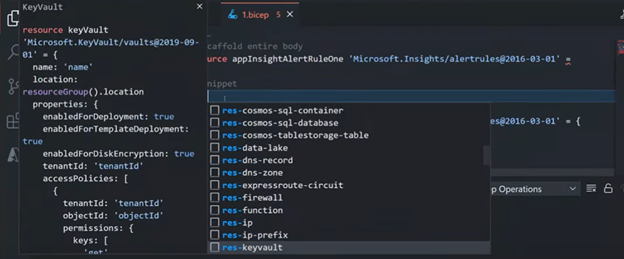
New Code Snippets
You will love to discover that bunch of new snippets has been added.
Just type res- and you will scroll over all those starter boilplet code. Just imagine how much time you will be saving. It is Huge!!!
Bicep Roadmap annoncements
Well, Bicep team annonced that next build will bring the v0.5 and they do target v1.0 by th end of the year. What does it mean is – there will be no API level breaking changes starting from the version v1.0.
What is Next?
Keep tuned for upcoming v0.5 version. The Module registry updates and syntax updates on OCI Artifacts are going to be next Huge things, as they will add into the maturity of this AWESOME tool in Azure!
I was prompted to update my CLI and wanted to share this easy experience with everyone.
There is an easy straightforward process to check & update your favourite Azure CLI in a few minutes without leaving the command line tool of your choice.
There are 2 commands that you would ever need going forward, assuming that your version of CLI is already “2.x”.
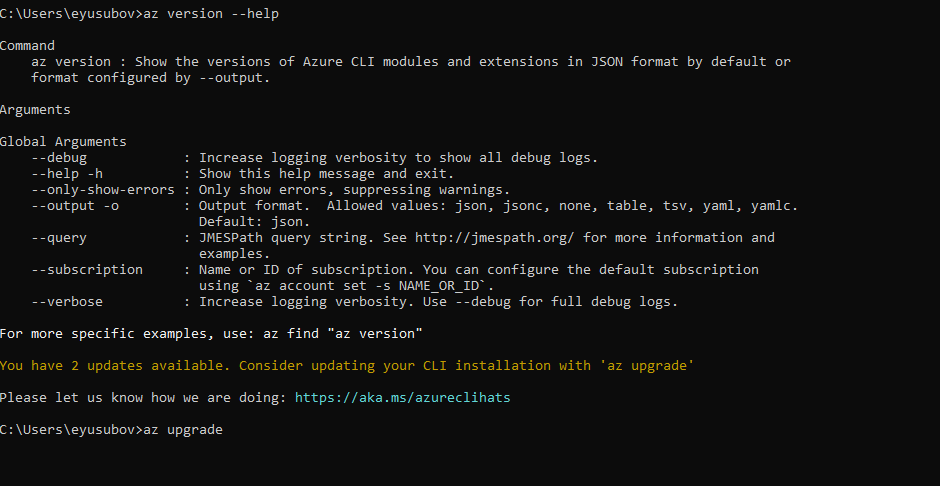
Check your az cli version
Just run the az version --help command first.
Check the AZ CLI version
Running update on AZ CLI
Next, run the az upgrade command and press key Y when prompted to continue.
Upgrade the AZ CLI version
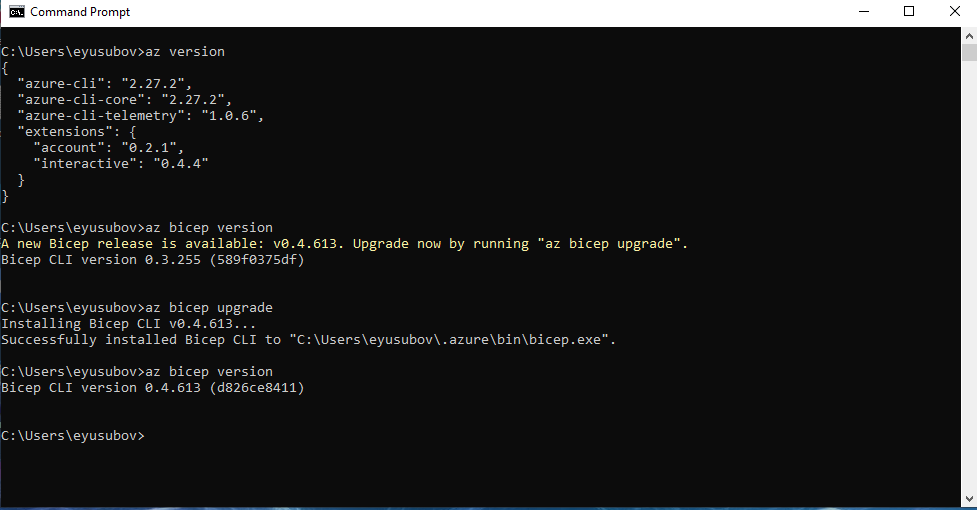
And finally, check the updated version and its extensions if needed.
Verify upraded version and Bicep
In case your AZ CLI is up to date, you could always run az bicep upgrade command and get the job done.
Stay tuned for more Azure automation & Security related posts.
I hope everyone getting a chance to enjoy the summer and spend some time with loved once.
That said – Azure Bicep team does not seem slowing down, and I love it! New features and capabilities have been added to Azure Bicep product v0.4 version, and we will review those innovations on this post.
What is Azure Bicep?
Azure Bicep is a domain-specific language (DSL) that significantly simplifies the Azure resource authoring. It makes representation of your Azure digital estate concise with clean syntax by adding reliable type safety and code-reuse.
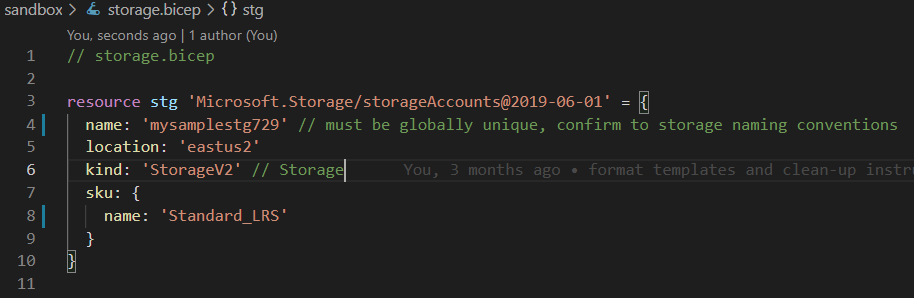
A typical Azure Bicep language code for an Azure storage account declaration will look as simple as the following code below – which basically explains why Bicep is called a DSL.
Why would you need it?
There are number of benefits in using Infrastructure-as-Code approach. Azure Bicep might be the right tool for you to use for Azure deployments, especially if you are trying to modernize and simplify the Azure deployment process.
Let’s look into scenarious where Bicep is the right tool to use:
✔️ Want to use language native to Azure? ✔️ Looking for fully integrated templates withing Azure platform? ✔️ Looking for fully supported product with Microsoft? ✔️ Don’t want to keep or worry about your resource state information ✔️ Looking to modernize and easy transition from JSON
Well, if your response is YES for above statements/questions then Bicep will be right tool for your solution.
New additions to Azure Bicep in version 0.4
There are numbers of enhancement and features has been added from this release. Let’s look at main Highlights of these features below:
✅ Linter MVP – The Bicep linter will inspect your code and catch a customizable set of authoring best practices. ✅ Deprecated parameter modifiers removed – Strip out deprecated parameter modifier syntax ✅ New code snippets – Suggestion with new code snippets added ✅ Bug fixes – Number of bug fixes added, thanks to community support ✅ Bicep Playground fixes – Playground doesn’t load after breaking change. ✅ Documentation and examples update ✅ Support for List method call on Azure resource references ✅ Support for JSON literal string conversion ✅ Support for using local json templates as modules ✅ Support for object body completion snippets
What is next?
There are still number of milestones in-front of Bicep team, as the versioning # of Bicep project indicates. That said, starting from Bicep version 0.3 you can get an official Microsoft support.
Below is the sneak-pick preview on what is cooking for v0.5 – which is expected to be out sometimes around August month this year.