Are you looking for a simpler, more efficient way to author infrastructure resources in Azure?
Azure Bicep First Look course
If so, you’re in luck. Azure Bicep is here to help. Bicep is a new domain-specific language (DSL) for deploying resources in Azure. It’s also a much cleaner, more concise language than ARM JSON—cloud admins and DevOps professionals, rejoice!
Every seasoned IT professional knows that sensitive information should not be exposed as a clear text on any code. This is especially true for infrastructure-as-code (aka, IaC) scenarios where passwords and keys are part of the deployment.
One way to stay compliant in accomplishing this goal is the integration of an Azure Key Vault service into your deployment code. This Azure security service is primarily intended to store sensitive information like password, keys, certificates, connections, etc.
In this post, we will look into two different ways how we could integrate Azure Key Vault services in our Azure Bicep code.
Option – 1: Using getSecret() function
Our first option is to delegate this important work to a getSecret() function. This option could be used with an existing Azure Key Vault resource that is declared in your Azure Bicep code.
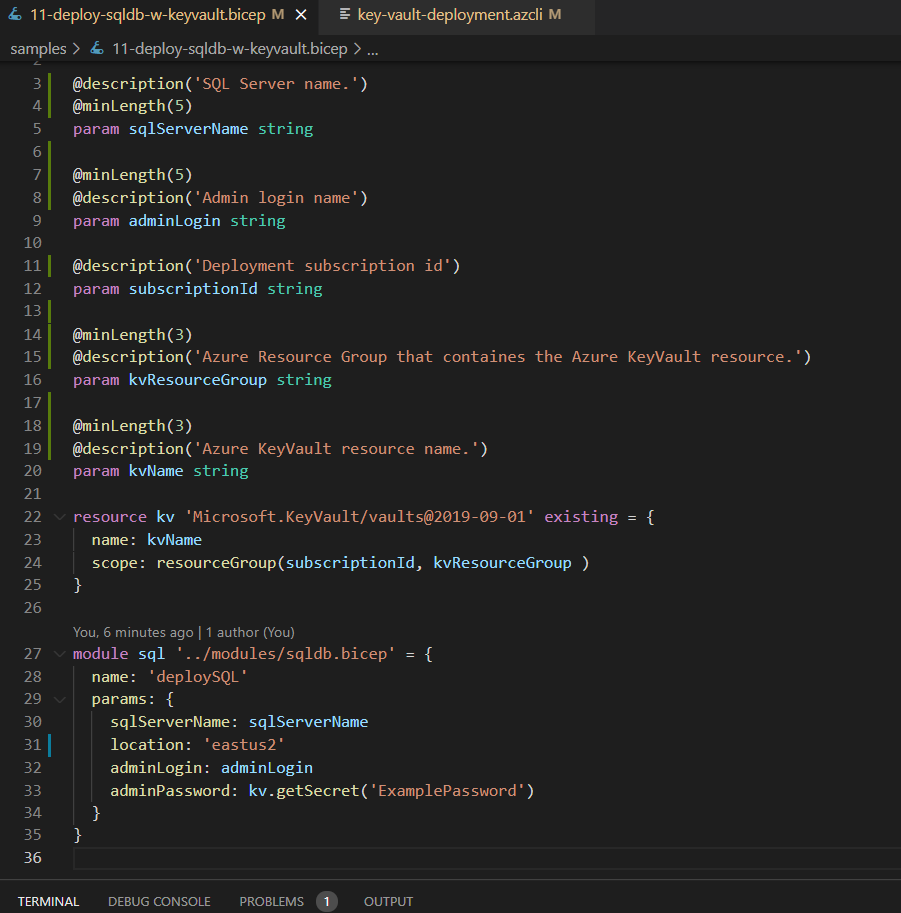
Let’s look into an example where an existing Azure Key Vault service is referenced to provide administrative password for SQL server deployment.
Deploying Azure SQL instance with Azure Key Vault
This sample Bicep code is using sqldb.bicep file as a module, where parameters; such as sqlServerName and adminLogin are passed through with a secret name of ExamplePassword.
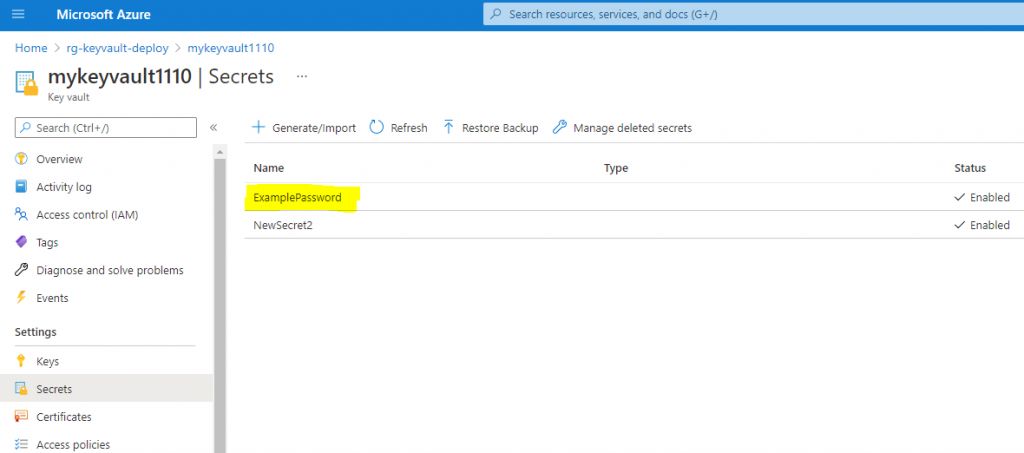
The ExamplePassword secret name should be already set and ready in the referenced Key Vault service above. Here is the view of this secret on Azure portal.
Azure Key Vault with secretes in portal
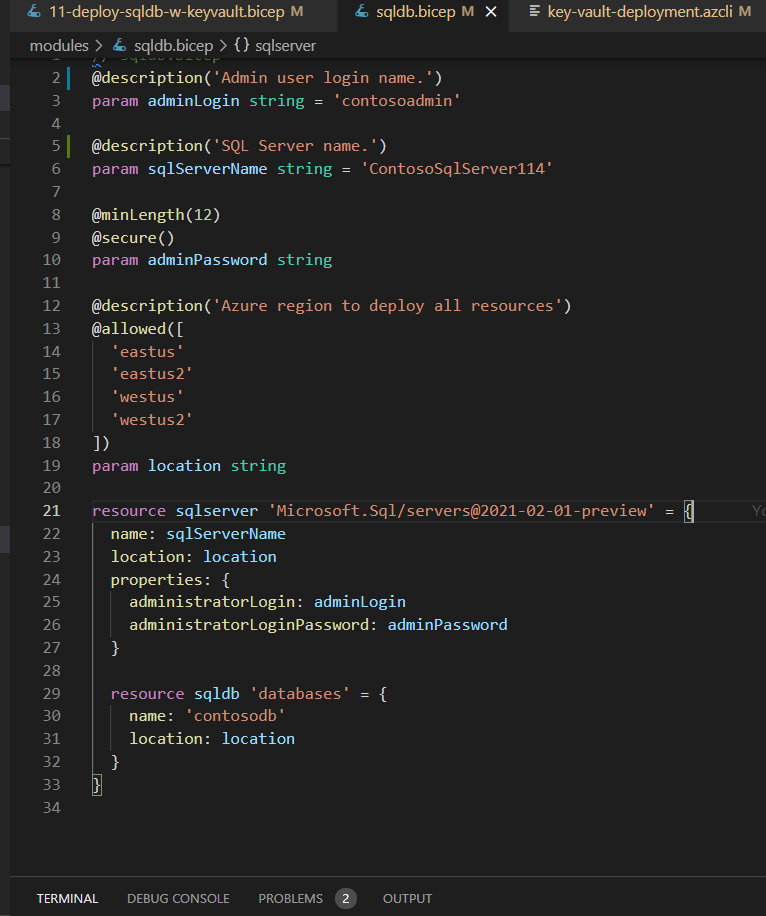
Let’s have a quick view into the sqldb.bicep file, as it is referenced in the main Bicep file.
sqldb.bicep file
Now, let’s deploy these resources with a secret value from Key Vault resource that has a secret name ExamplePassword.
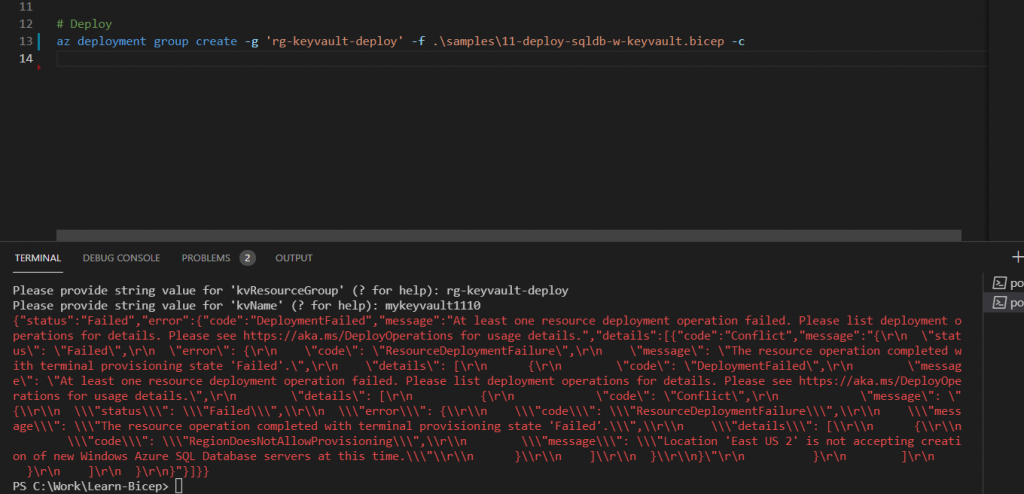
What happened? I am getting an error on my first deployment execution 🙁
Error on deploying Bicep code with SQL server provisioning
Upon carefully analyzing error, I see the following reason for this error:
At least one resource deployment operation failed. Please list deployment operations for details. Please see https://aka.ms/DeployOperations for usage details.”,”details”:[{“code”:”RegionDoesNotAllowProvisioning”,”message”:”Location ‘East US 2’ is not accepting creation of new Windows Azure SQL Database servers at this time.
Azure deployment error
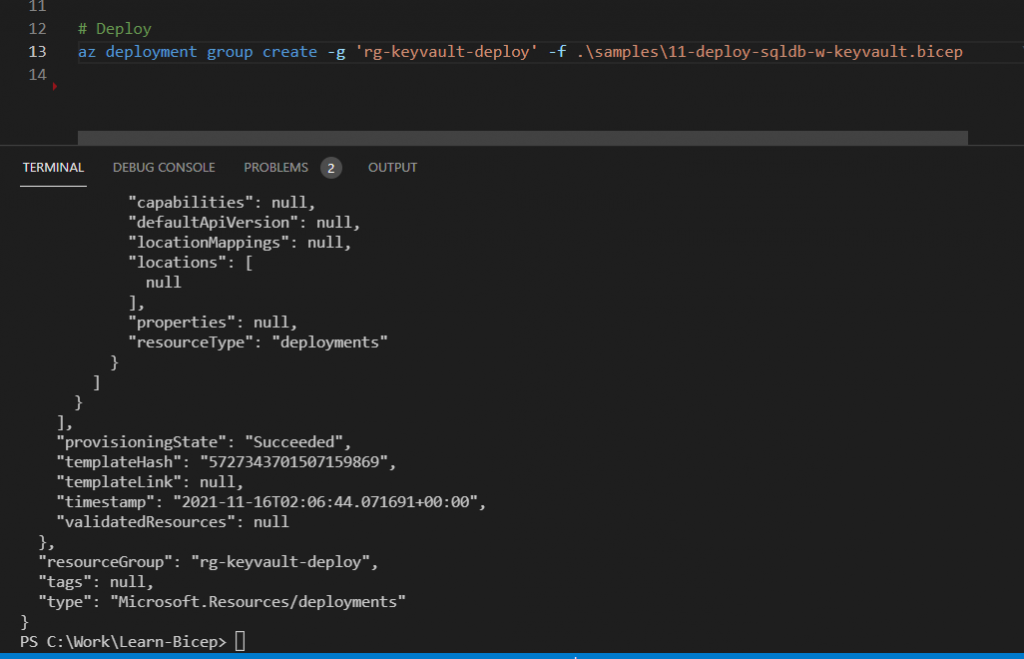
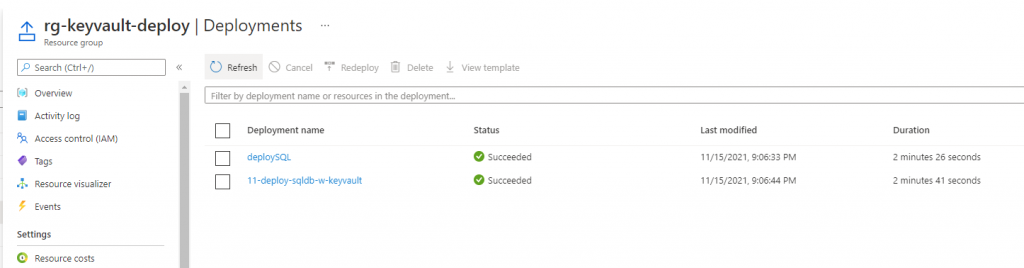
Based on the error message, we change the location to eastus and re-run the script. Now, we got the following positive result in console and portal:
Deployment results in Azure Portal RG
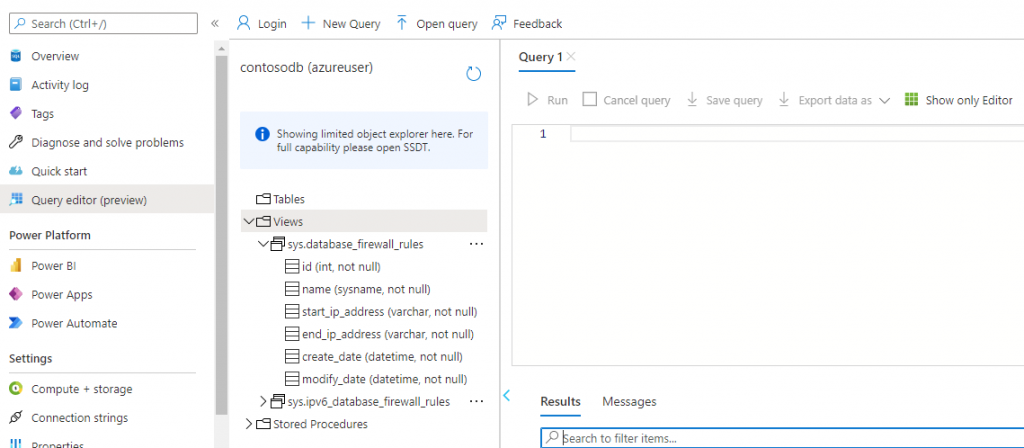
Next, we will attempt to login into a SQL Server instance. A successful login will look like the following screen:
Successful login into the SQL instance
Important Note:
If you are getting an error during the login then try to check the following steps:
adminLogin name is entered correctly
your IP address is added to the SQL server firewall rules
grab a cup of coffee and check back in 5 minutes
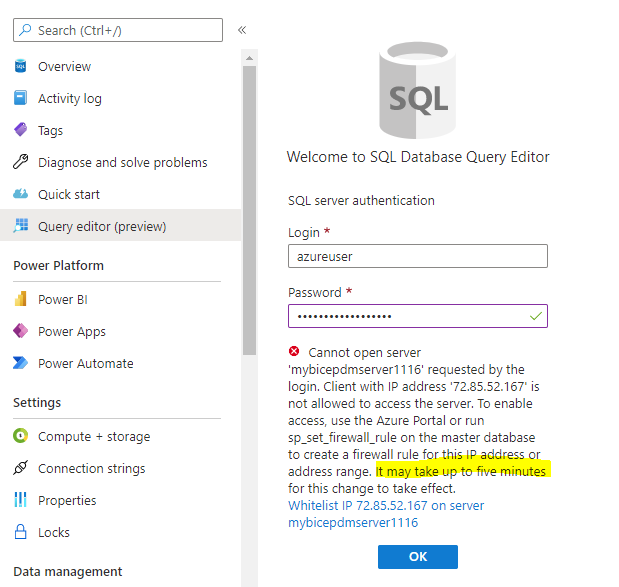
Description of a typical login error into a SQL server instance is provided below. I checked the firewall rules and made a cup of coffee => before getting a successful log-in 🙂
Requires your location IP activation
Option -2: Referencing as a secretName in parameter
The second option is pretty straightforward, if you have already used it on ARM template deployments.
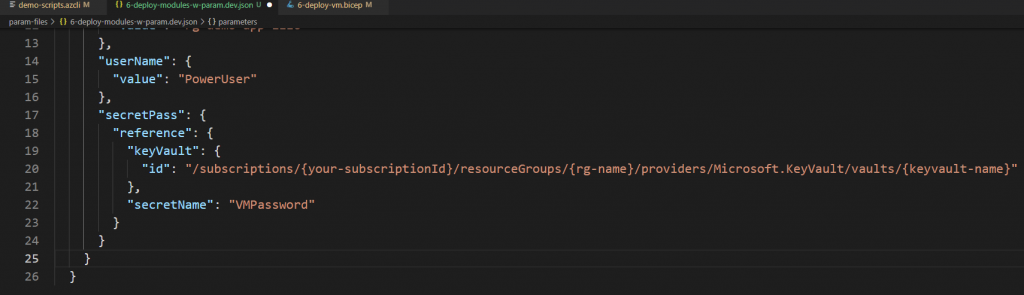
We just need to reference Azure Key Vault secret like in the following example:
Using a parameter file and referencing the Key Vault secretName will do the trick in extracting the value and provisioning your resource.
Let’s run the bicep file that deploys multiple RGs and an Azure VM that uses VMPassword secret.
Running deployment with Bicep parameter file
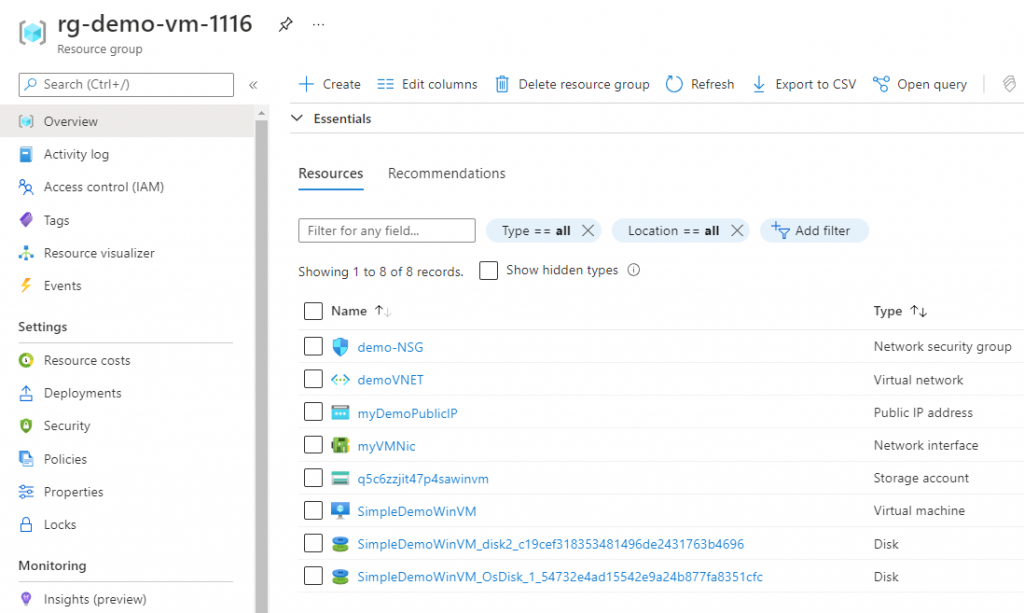
A successful deployment provisions following RG with the VM resources:
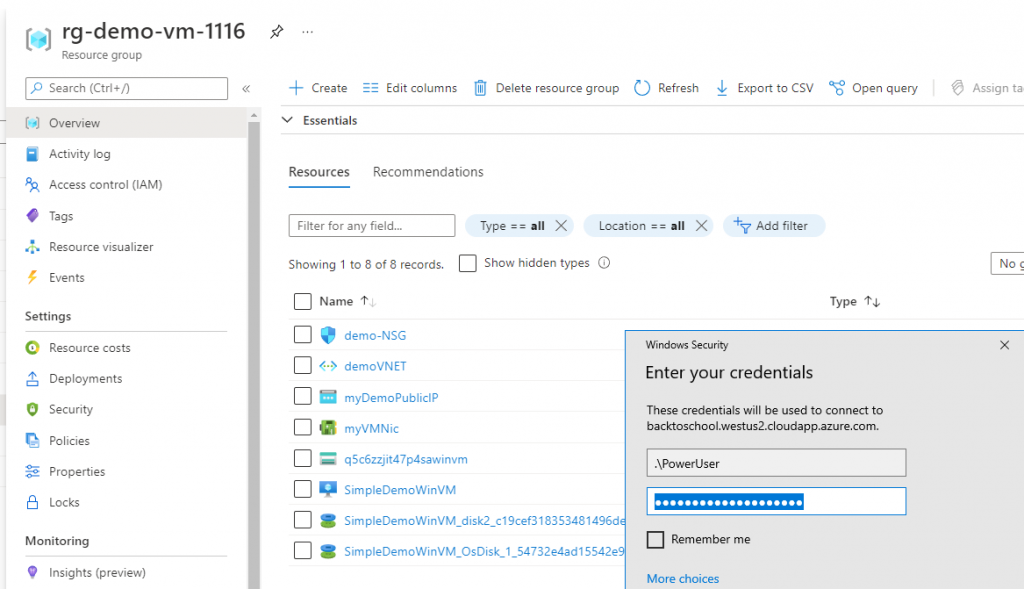
Next, we should smoke test our deployment by locating the resource group “rg-demo-vm-1116” and using deployment parameters to RDP into Windows server:
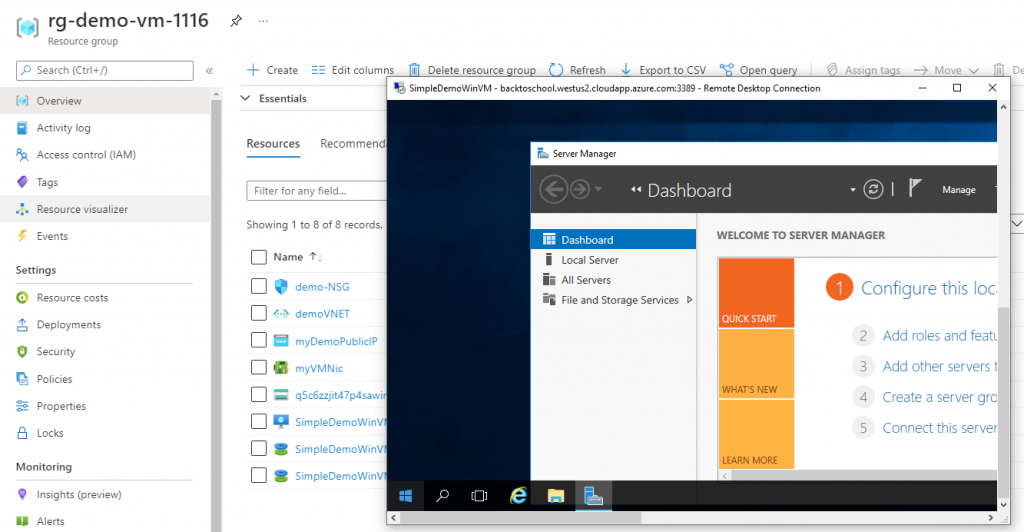
Finally, we are able to see that secret and admin user name pair worked as expected
Azure VM deployed using Key Vault secret
Summary
In this post, we looked into two available options that harden our infrastructure code by removing hard-coded sensitive information and replacing it with Azure Key Vault reference. Thus, avoiding any potential leaks of passwords, secrets, etc.
IMHO, first option is better than the later one, because it does not expose subscription id and other small details.
I am very excited to see you all in the next Omaha Azure User Group meetup. This time we will speak about the latest advancements and use cases you could apply in your Azure resource authoring toolkit.
As it was the case last year, Microsoft Ignite is back and held digitally free of charge, during Nov 2-4 🎉 🎇
Microsoft Ignite is a signature event and held virtually for a global audience across a variety of industries to experience the latest and greatest technologies. It is an event where you could get a sneak peek at new products and services that will be coming in the future.
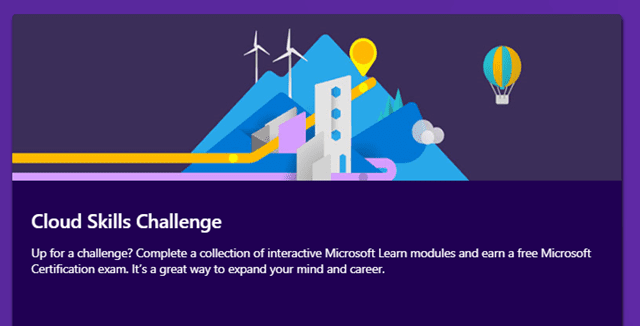
Microsoft Ignite 2021 – Cloud Skills Challenge
Cloud Skills Challenge
This year you could choose from 12 tech challenges and select the one that is right for you. Once you complete that challenge you will earn a free Microsoft Certification exam that can be applied to your choice from a select list of options:
Azure Developer Challenge
Azure Admin Challenge
Identity + Information Protection Challenge
Teams Admin Challenge
Teams Voice Engineer Challenge
Azure Database Admin Challenge
Desktop and Device Management Challenge
Windows Server Hybrid Admin Challenge
Dynamics 365 Sales Consultant Challenge
Dynamics 365 Supply Chain Mgmt Challenge
Power Platform Developer Challenge
Security Operations Analyst Challenge
When does the challenge begin?
The listed challenges will begin on November 2, 2021 and end on November 30, 2021. You can start your registration here to join the challenge.
What happens when I complete my Cloud Skills challenge?
If you complete your challenge before it ends, one Microsoft Certification exam will be associated with your Learn profile on December 7, 2021. You will be notified via email when it becomes available.
What are the Terms and Conditions?
Check out the Official rules; including Terms and Conditions with FAQ in this web page.
Summary
That’s it friends, buckle up to complete your challenge before Nov 30, 2021 to earn new skills and receive a complementary Azure exam award 🏆.
As you may know, it is that time of a year when great content will be coming to the town! You could enjoy and learn throughout the month of December, as people behind the #festivetechcalendar will be bringing you lots of new content from different communities and people around the globe.
This year, I have submitted two sessions and have been nicely surprised yesterday. Both sessions have been accepted and I am looking forward to deliver following sessions for the community:
Session # 1: What you need to know about Azure AD security defaults?
Accepted session – “What you need to know about Azure AD security defaults?“
In this session above, we will discuss about how to get started with Azure security on right foot and its challenges. We will focus on importance of a strong Identity and Access in any cloud solution that we are creating for our customers. One simple way to get started is review and adjustment of security default options in Azure AD. We will also look into the set of practices to get you started with Azure AD setup and learn about the benefits of Azure Security Benchmark.
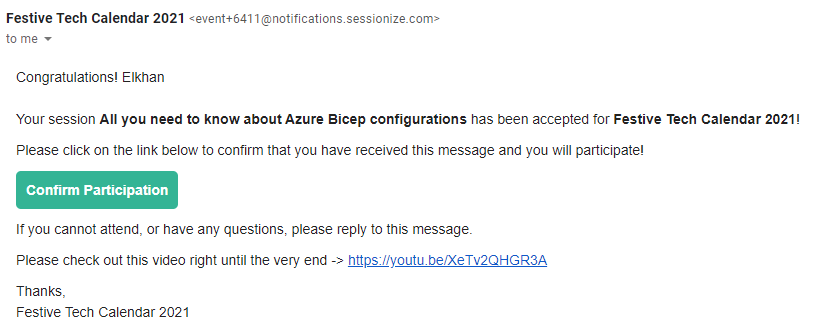
Session # 2: All you need to know about Azure Bicep configurations
Accepted session -“All you need to know about Azure Bicep configurations”
In the second session, we will talk about Azure Bicep – a new language that aims to ease Azure resource authoring and management. This new language comes with a powerful VS Code extension and config file options. In this session, we will unveil dozens of powerful features in our config file to suit your style of coding on VS Code and cheer up our productivity skills. We will apply our fresh skills by creating several Bicep demos in the process.
Conclusion
I sincerely hope that these sessions will spark your interest and I am looking forward to see you all during this event. But most importantly, I hope you could have lots of fun during this festive month.
Stay tuned for more Azure AD, Automation & Security related posts.
It is a pretty common situation when as a Developer you are not granted access to work with company Azure AD. And there are many reasons why corporate security / IT would be hesitant to provide that access.
However, this situation should not discourage you from experimenting and prototyping solutions that you have.
Let’s consider following two easy options to create a free Azure Active Directory with Premium (P1 or P2) trial licenses. This will enable you to install/create an app that requires Azure AD license, and start testing and validating your workloads right away:
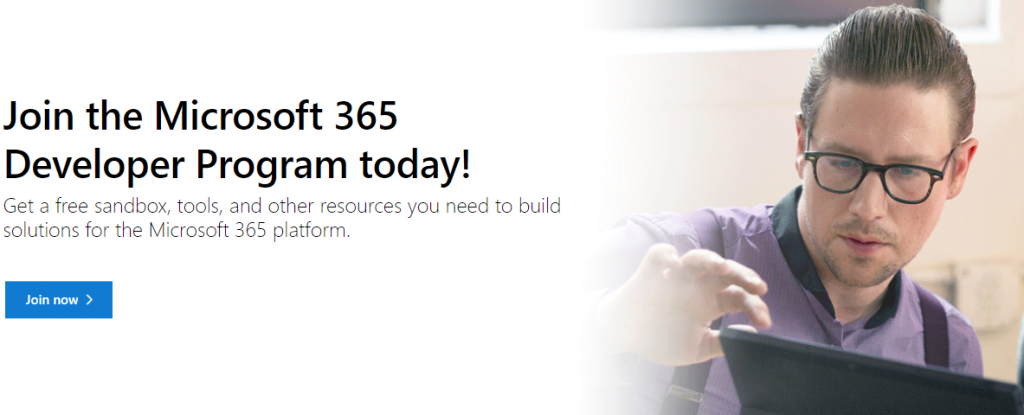
Option # 1: Microsoft 365 Developer Program
Join a free Microsoft 365 Developer Program and get a free sandbox, tools, and other resources you need to build solutions for the Microsoft 365 platform. Resources like an Azure AD with Premium licenses, pre-configured users, groups, mailboxes and etc.
Option # 2: Create an Azure trial account
Create a new free Azure AD account with a tenant and activate your Premium licenses in your new tenant. This is a classic option for anyone who is trying to learn Azure for the first time.
The Azure trial account will give you one month to play with Azure and Azure AD services, where you will get certain credits to spend on Azure resources. You will get an option to convert this trial subscription into a paid one at the end of the trial period.
How to Join Microsoft 365 Developer Program
My recommendation would be to sign up for the free Microsoft 365 developer program that gets renewed automatically, if you are using that account. Check out the following instructions on how to set-up one:
2. Sign in with a exisiting or new Microsoft Account you already have
3. On the signup page, fill the form and accept the terms and conditions of the program, and click next
4. Continue with a subscription set-up. You should specify the region where you want to create your new tenant, create a username, domain and enter a password. This step will create a new tenant and an administrator account of the tenant.
5. Enter the security information which is required to protect the sensitive administrator account. Complete this step by setting up MFA authentication for your admin account.
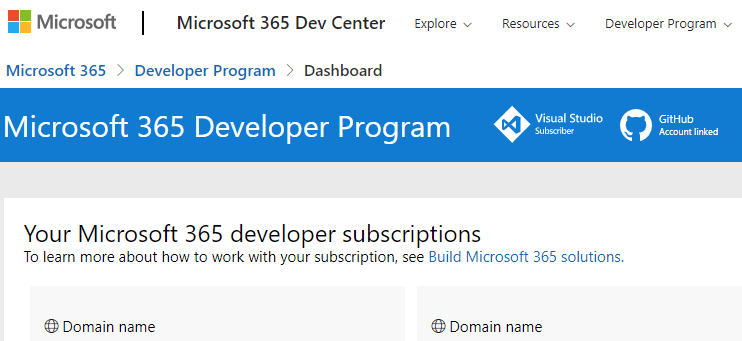
6. Link your developer account with your GitHub account for an easy renewal. You should see the following GitHub account link blue banner, once the linking operation succeeds.
Congratulations! You have created a new Azure AD tenant with 25 E5 user licenses. This also includes Azure AD Premium licenses.
As an additional perk, you can also add sample data packs with users, Mail & Events and SharePoint, as sample data for your development environment.
Good Luck on your next M365 project!
Stay tuned for more Azure AD, Automation & Security related posts.
In my previous Azure Bicep post, I wrote about four parameterization options that could be used with Bicep language. We also looked into the Azure Bicep resource templates, and how they help to author and manage Azure resources more cleanly and easily.
Azure Bicep Tips – Hardening parameter inputs
Now, I would like to share a couple tips on how to harden your parameter inputs. This will help you to avoid deployment errors that you could easily prevent by restricting and checking Bicep parameter values.
Tip # 1: Min and Max length of resource names
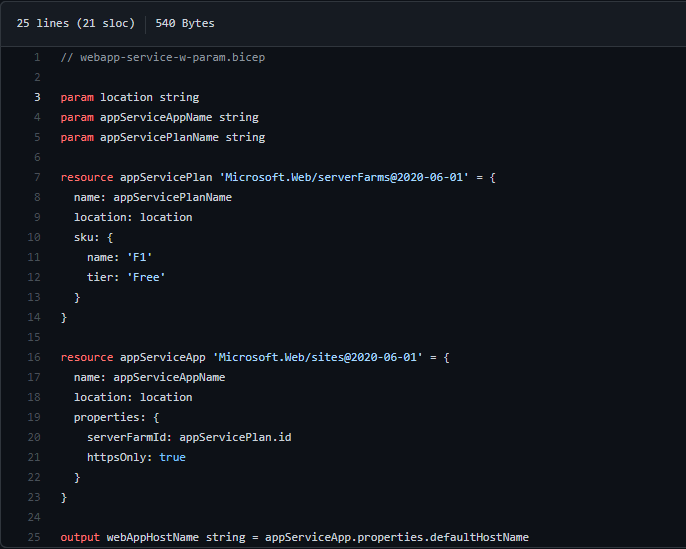
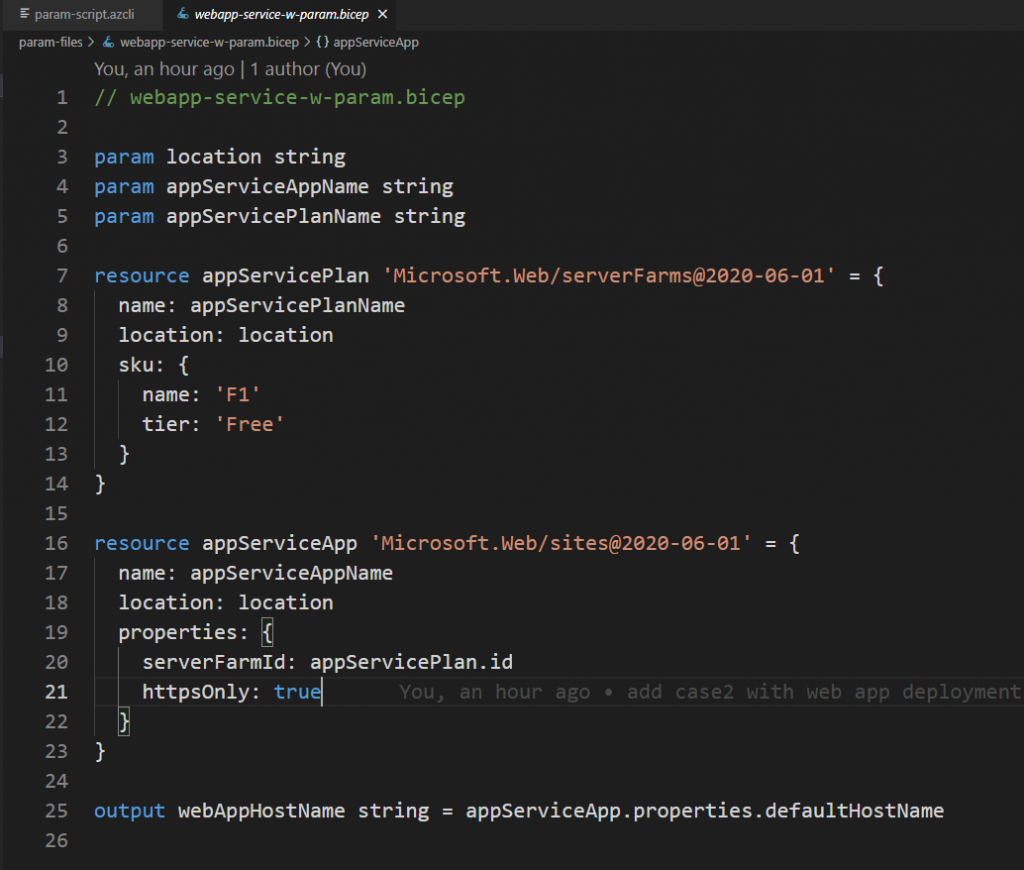
In our previous post, we have built and demoed the webapp-service-w-param.bicep file. It had no parameter input validation. Thus, that template is open for failures when you enter 'a' for the appServiceAppName input parameter. Here is the link to the repo.
webapp-service-w-param.bicep
However, it is pretty straightforward to avoid such false entries by checking the allowed name length of the Microsoft.Web/serverFarms resource in the Microsoft docs Resource name rules page.
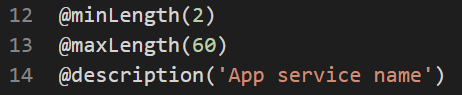
Based on “Resource name rules” page we can add following functions:
The @minLength and @maxLength function are going to define and enforce min and max length of the parameter, while @description will help to define the purpose of the parameter.
Tip # 2: Defining purpose of the parameter
It is always helpful to add meaningful description to your parameters, even though it is not required by Azure Bicep template. Believe it or not, people who are new to your code will appreciate it. For example: we have a location parameter in our template, and adding the following description clarifies the purpose of this parameter for everyone, including myself, later in a month when I am re-visiting my code.
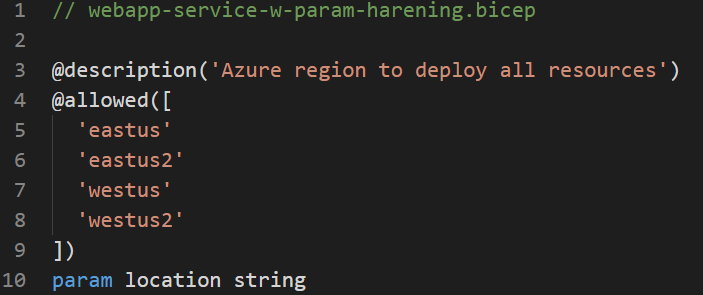
Tip # 3: Restricting parameter value entries that match your organization’s policy
The final tip is already revealed in our screen-shot above. It makes a valid and important sense to enforce your organization’s Azure policies on any provisioning scripts, in addition to the Azure Policies.
In our example: we are restricting deployment of Azure resources only into the following Azure regions to comply with the company policy to make every party happy.
Thus, I have shared a few tips that you could use to harden your Azure Bicep code and avoid some common deployment errors in advance.
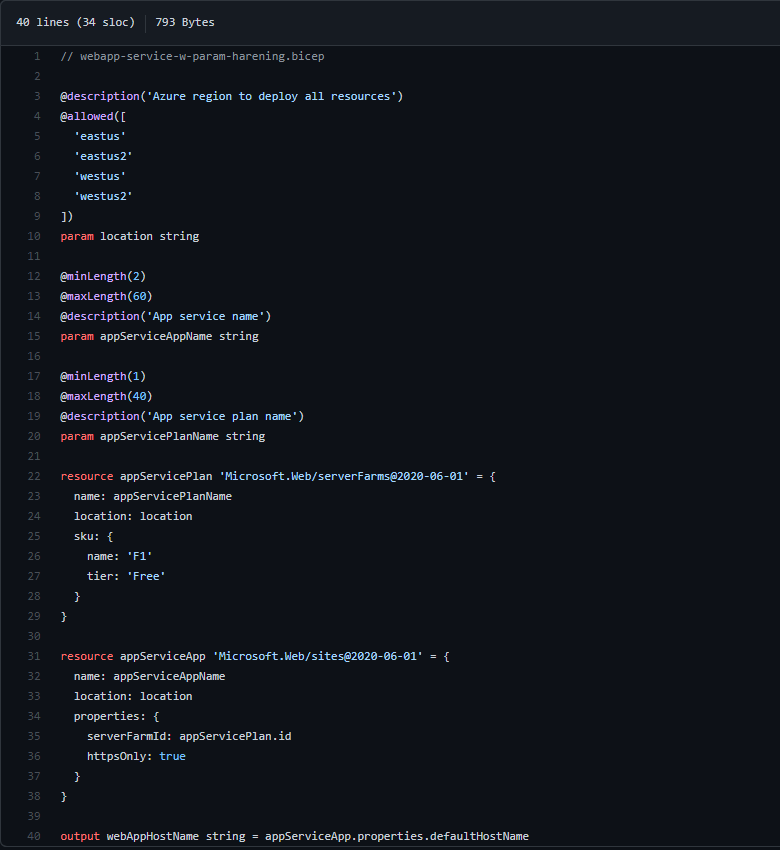
Here is the complete view into our hardened webapp-service Bicep file:
Summary
Preventing deployment failures, especially the once that are caused by invalid input parameters are an easy fix on an Azure Bicep language. Checking the resource name restrictions and allowed values is one easy tip to prevent those errors. I would recommend checking the Microsoft documentation on “Naming rules and restrictions for Azure resources” and bookmark it for your reference.
Thank you 🙏 for reading this post and learning how to prevent Azure Bicep deployment failures by hardening the input parameter values.
Please check out the Learn Bicep GitHub repo, and follow it. Thanks, 🙏 🙌!
Stay tuned for more Azure automation & Azure Bicep posts.
In my last posts, I wrote about Azure CL and a Bicep language. The Azure Bicep language, helps to author and manage Azure resources more cleanly and easily on your Azure subscription.
The parameterization of infrastructure deployment files is an important skill where true power of automation and code reuse comes forward. Let’s learn about different parameterization options that you could use in your Azure Bicep deployments. As an example, we will examine the following parameterization options on an Azure Bicep web app deployment file.
✔️ Using Bicep file as is
✔️ Using default parameters on your bicep file
✔️ Simply adding parameters into your command line
✔️ Using a separate file for parameters, per environment
Option 1: Using Bicep file as is
This first option is the most straightforward way to declare your parameters. However, you would have to enter each parameter name, every time you are deploying the Azure resources.
Following screenshot is a default Bicep web app declaration with parameters. Check the Learn Bicep repo here 👍
Now, let’s declare an Azure CLI command that will deploy our Azure Bicep file into a Resource group.
# Create a rg-test-deploy RG
az group create -l eastus -g 'rg-test-deploy'

# Option-1: Run deployment file as is
az deployment group create -g 'rg-test-deploy' -f .\param-files\webapp-service-w-param.bicep

# List all webapps in the subscription
az webapp list --query [].name -o table
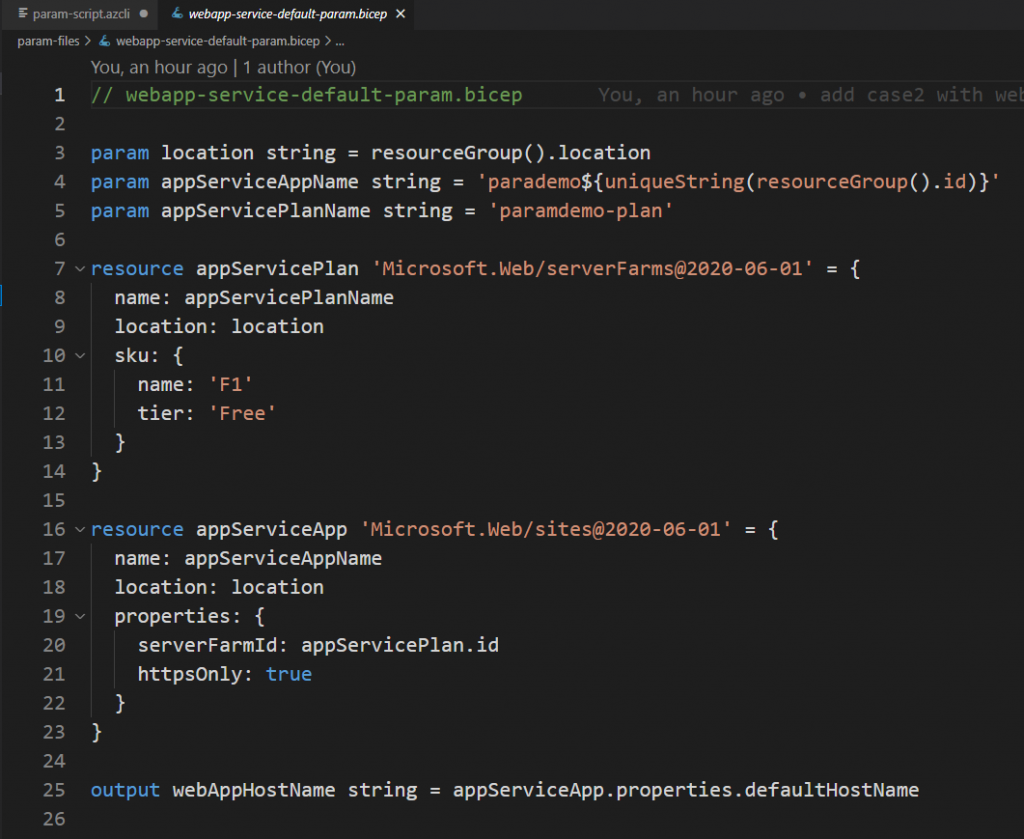
Option 2: Using default parameters on your bicep files
The second option will allow us to deploy our Bicep file without entering the default values each time. However, it would require an update on file each time you want to change parameter values 😢
Now, we can take the previous webapp-service Bicep file, and add its default values. The updated Bicep file will look like the following screenshot:
Our Azure CLI deployment script would just get a new file name
# Option-2: Run deployment with default values
az deployment group create -g 'rg-test-deploy' -f .\param-files\webapp-service-default-param.bicep

# You could also add preflight check with "-c" at the end of each deployment script
Option 3: Simply adding parameters into your command line script
If you would prefer to type parameters and values on a terminal then third option can deliver it for you. That script will look like the following sample:
# Option-3: Run deployment with inline parameters
az deployment group create -g 'rg-test-deploy' -f .\param-files\webapp-service-w-param.bicep -p location='eastus' appServiceAppName='param-demoapp18' appServicePlanName='asp-param-demo'
Option 4: Using a separate file for parameters, per environment
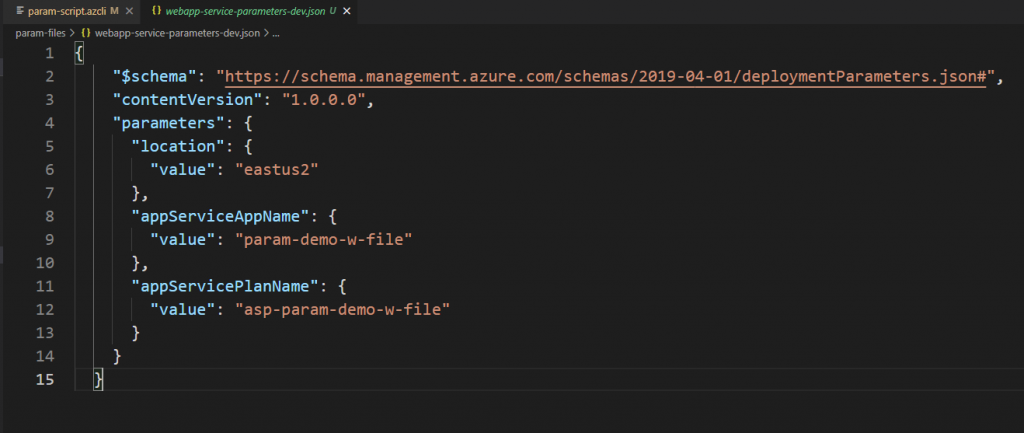
The last option has multiple advantages over prior options. As you could create separate environment parameters in their own dedicated files and manage them accordingly. For example: You can create a separate param file for “Dev” environment deployments; like in the following screenshot.
Note: parameter files for Bicep language are using a JSON notation, similar to the way how ARM JSON declares parameter files with a following schema.
And our deployment script will look like the following sample:
# Option-4: Run deployment with a separate parameter file
az deployment group create -g 'rg-test-deploy' -f .\param-files\webapp-service-w-param.bicep -p .\param-files\webapp-service-parameters-dev.json

# List all webapps in the subscription
az webapp list --query [].name -o table

# Clean all resources from RG
az group delete -n 'rg-test-deploy' --yes
Summary
Thank you 🙏 for reading this post and learning about four different options to deploy your Azure Bicep files using Azure CLI.
Please check out the Learn Bicep GitHub repo, and follow it. Thanks 🙏 🙌 !
Stay tuned for more Azure automation & Azure Bicep posts.
I was prompted to update my CLI and wanted to share this easy experience with everyone.
There is an easy straightforward process to check & update your favourite Azure CLI in a few minutes without leaving the command line tool of your choice.
There are 2 commands that you would ever need going forward, assuming that your version of CLI is already “2.x”.
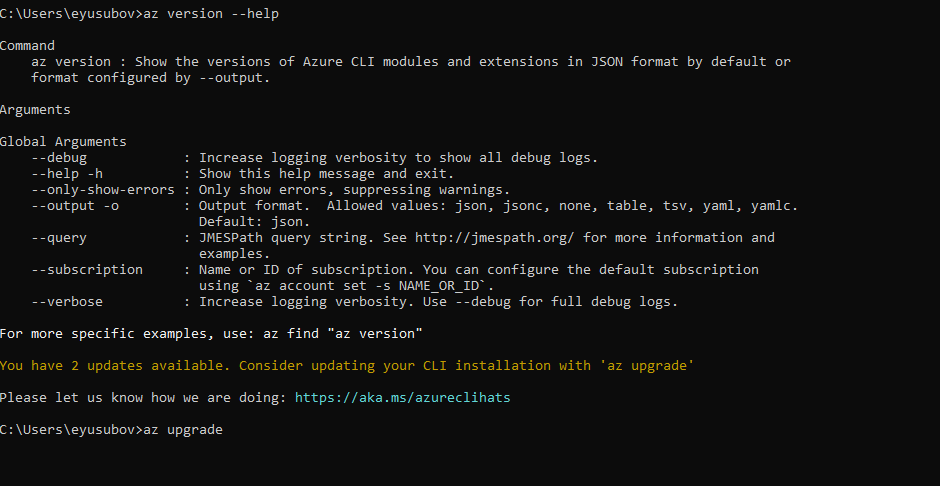
Check your az cli version
Just run the az version --help command first.
Check the AZ CLI version
Running update on AZ CLI
Next, run the az upgrade command and press key Y when prompted to continue.
Upgrade the AZ CLI version
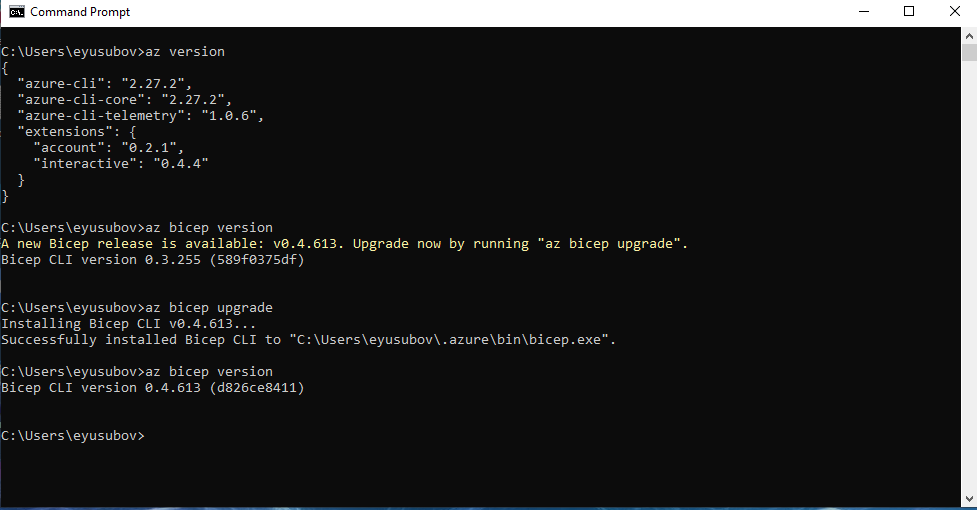
And finally, check the updated version and its extensions if needed.
Verify upraded version and Bicep
In case your AZ CLI is up to date, you could always run az bicep upgrade command and get the job done.
Stay tuned for more Azure automation & Security related posts.
This week a new service – Fusion Detection for Ransomware has been announced. These Fusion detections correlate alerts that are potentially associated with ransomware activities that are observed at defense evasion and execution stages during a specific timeframe.
What is Ransomware?
Ransomware attack is a type of attack that involves using specific types of malicious software or malware to make a network or system inaccessible for the purpose of extortion – ‘ransom’.
There is no doubt that ransomware attacks have taken a massive turn in being the top priority as a threat to many organizations. A recent report released by PurpleSec revealed that the estimated cost of ransomware attacks was $20 billion in 2020 and with downtime increasing by over 200% and the cost being 23x higher than 2019.
Preventing such attacks in the first place would be the ideal solution but with the new trend of ‘ransomware as a service’ and human operated ransomware, the scope and the sophistication of attacks are increasing – attackers are using slow and stealth techniques to compromise network, which makes it harder to detect them in the first place.
AI in action with Azure Sentinel for help!
Good new is that #azuresentinel 🔥 is constantly getting more efficient by introducing #AI in action – Sentinel #fusion!
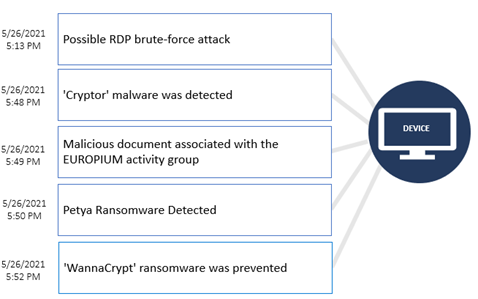
In order to help your analyst quickly understand the possible attack, Fusion provides you with a complete picture for the suspicious activities happened on the same device/host by correlating signals from Microsoft products as well as signals in network and cloud. Supported data connectors include:
”With Fusion detection for ransomware that captures malicious activities at the defense evasion and execution stages of an attack, it gives security analysts an opportunity to quickly understand the suspicious activities happened around the same timeframe on the common entities, connect the dots and take immediate actions to disrupt the attack.”
Microsoft is commited to release new multistage attack scenarios detected by Fusion in Azure Sentinel. You could keep an eye on there Azure Sentinel Fusion page and get latest updates there 🙂
Stay tuned for more Azure automation & Security related posts.